
One of the most common post-event tasks is collecting presentations from your speakers and sharing them with attendees. Sessionize makes this easy with a streamlined workflow: you create a file upload field, send a group mailing to your speakers asking them to upload their files, and then make the collected presentations available on your website, through the API, or in your event's app.
In this article we'll walk you through the entire process.
Step 1: Create a file upload field
Before you can collect presentations, you need a file upload field attached to your sessions. You can create one in two ways:
On the Edit event page. Go to the Edit event page, navigate to the Additional fields tab, and create a new field. Name it something clear like "Session presentation", set the field type to File upload, and save your changes.
Directly from Group mailing. You can also create the field while setting up your group mailing message, which is covered in the next step. This is often the more convenient option, as it lets you create the field and request the data in one go.
Make sure to select File upload as the field type. Other field types (text, checkbox, web address, etc.) won't allow speakers to attach files.
Step 2: Collect presentations through group mailing
With the file upload field in place, you can use Group mailing to send a message to your speakers asking them to upload their presentations.
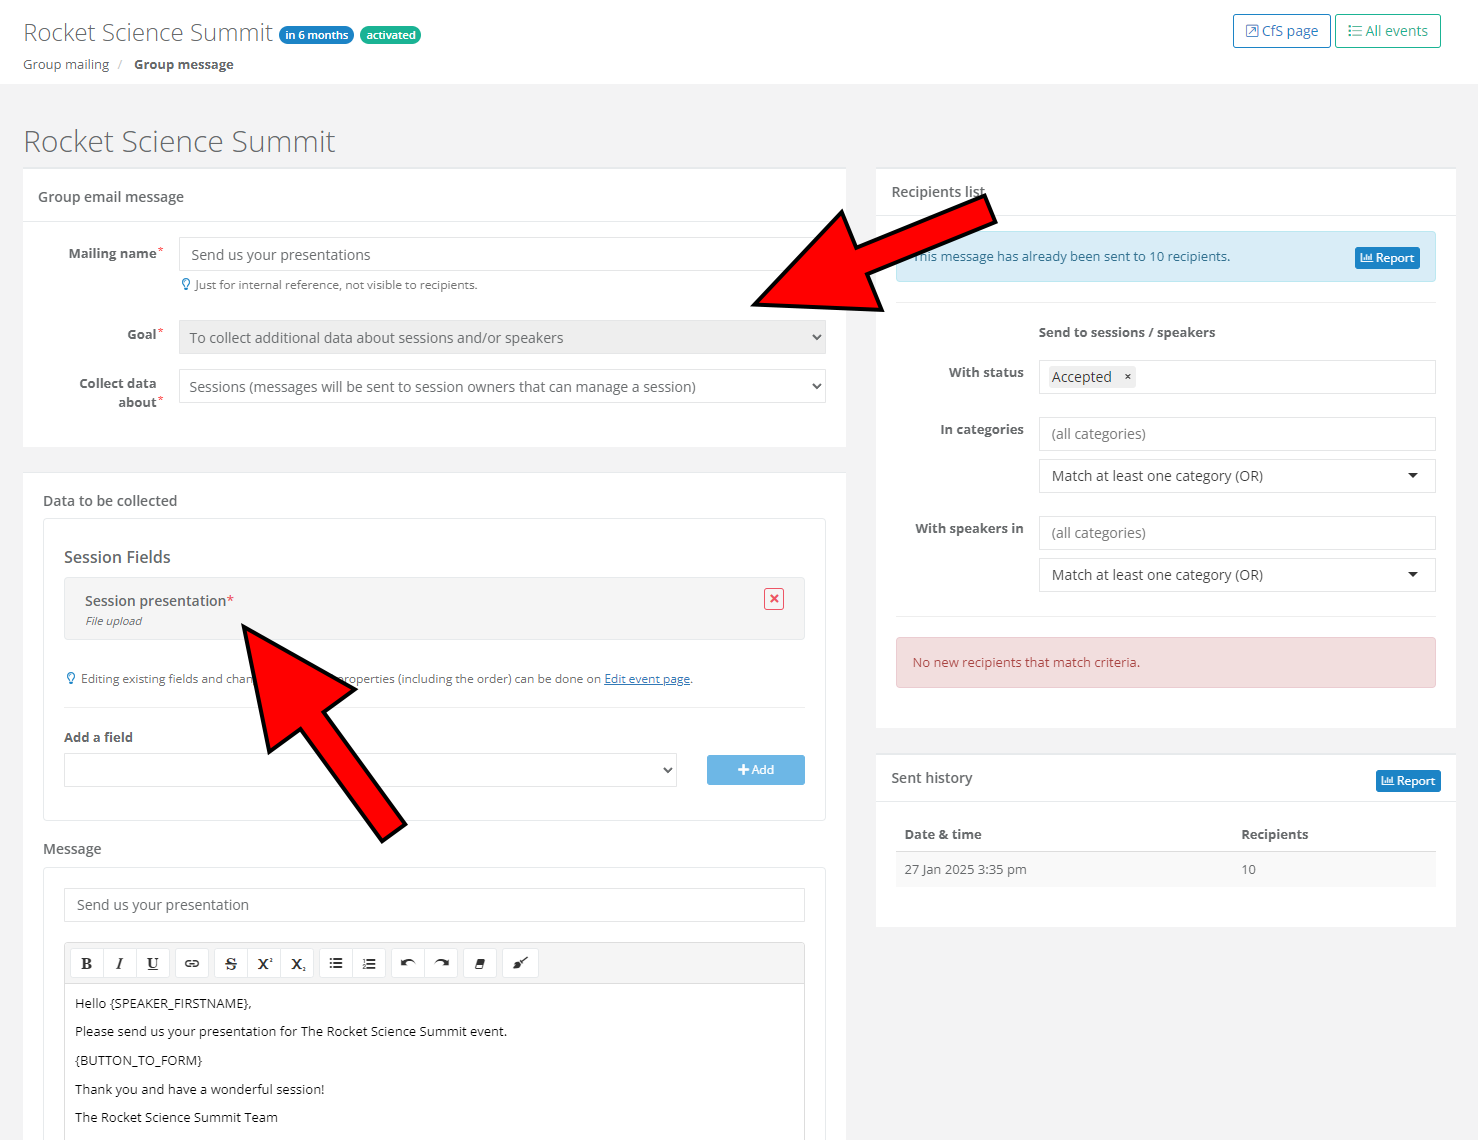
Go to the Group mailing page and click New mailing
Set the Goal to To collect additional data about sessions and/or speakers
In the Collect data about menu, select Sessions
Under Data to be collected, select your "Session presentation" field. If you haven't created it yet, click Create new session field and set it up as a File upload field
Write your message and make sure to include the {BUTTON_TO_FORM} variable - this becomes the button speakers click to open the upload form
Review the list of recipients on the right side of the page and select or deselect as needed
Click Send emails
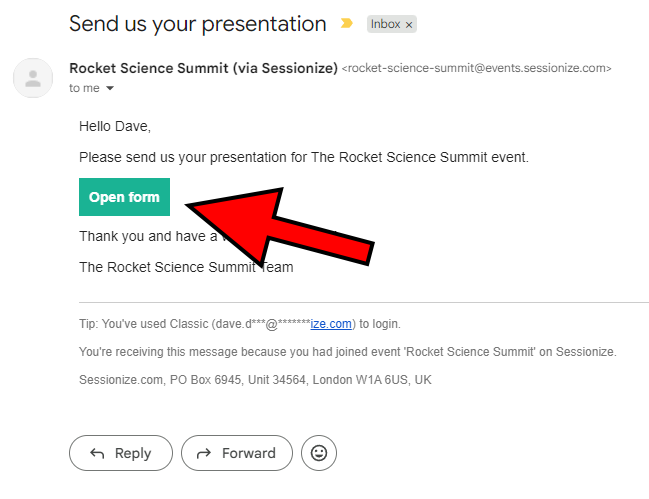
Your speakers will receive an email with an Open Form button.
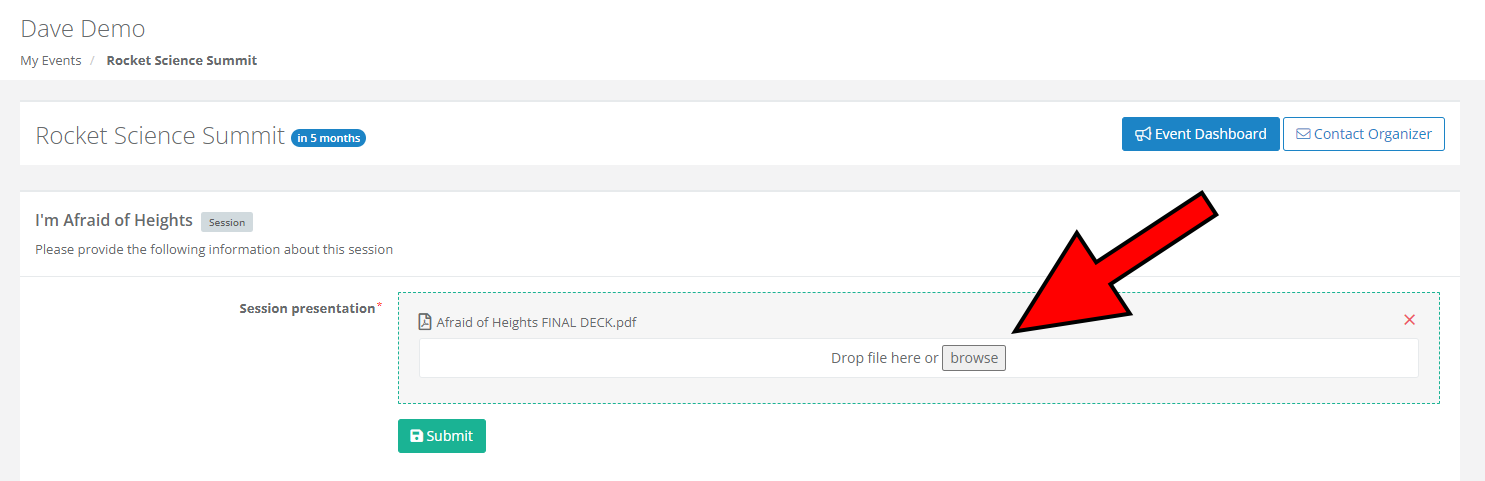
Clicking the Open Form button takes speakers to a simple form where they can upload their presentation file and submit it.
For a more detailed overview of group mailing and all of its options, please read the following article: Collect additional data through Group mailing.
Step 3: Track uploads and download presentations
Every group mailing comes with a built-in report that shows you who has opened the form, who has uploaded their file, and who still hasn't responded. You can access the report through the Group mailing page.
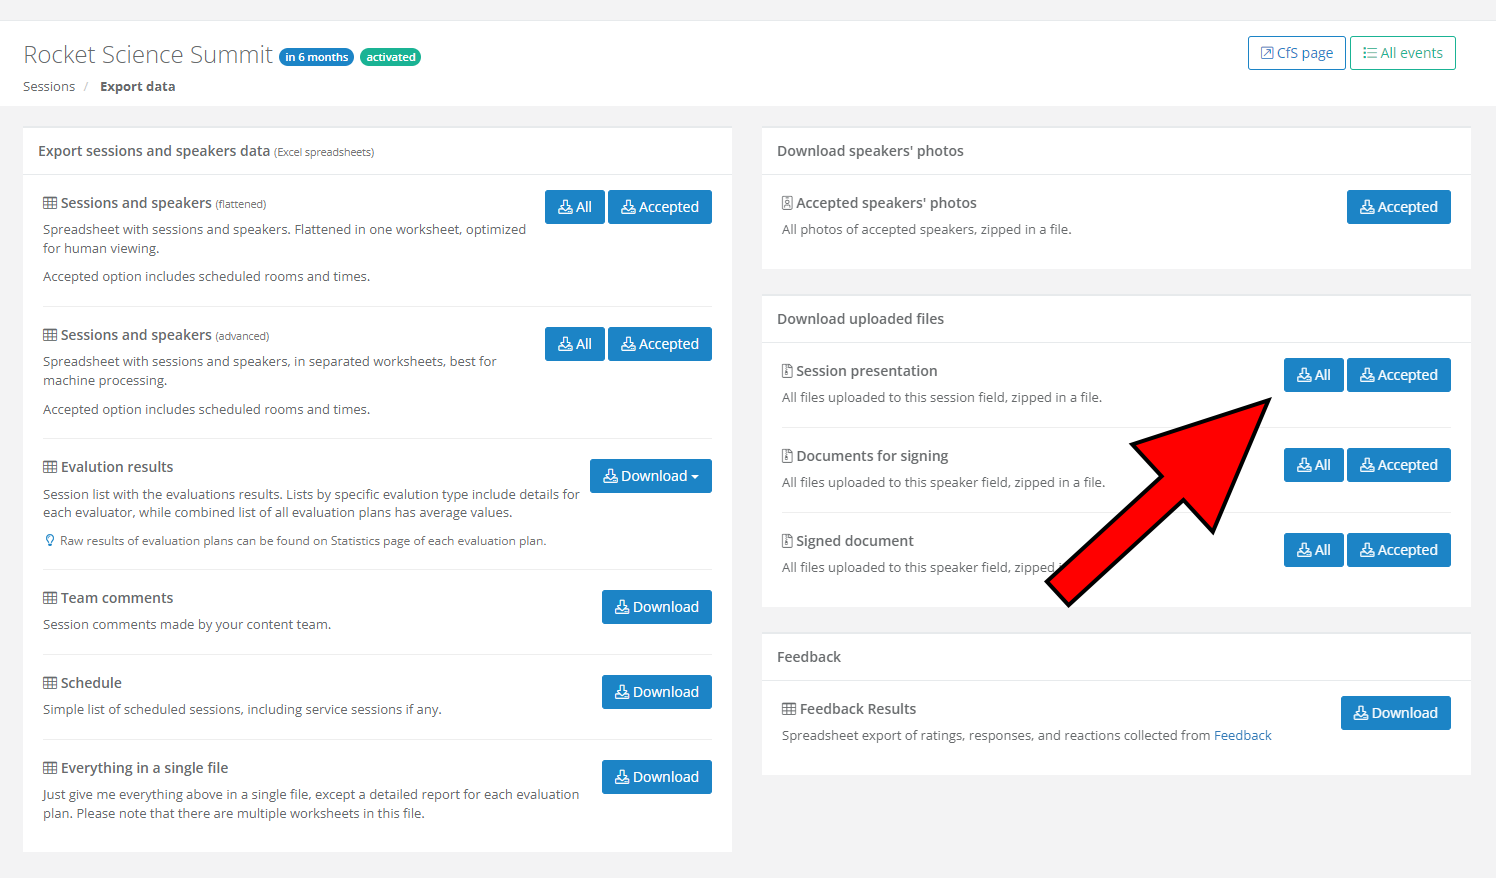
Once speakers start uploading their presentations, you don't have to download them one by one. Go to the Export page, find the file upload field you created (e.g. "Session presentation"), and click the download button. Sessionize will pack all uploaded presentations into a ZIP file that you can hand over to your technical staff or use however you need.
Step 4: Share presentations through embeds and the API
If you want your attendees to be able to download the presentations directly from your website - through the embedded schedule or session list - you need to enable the field in your embed or API endpoint.
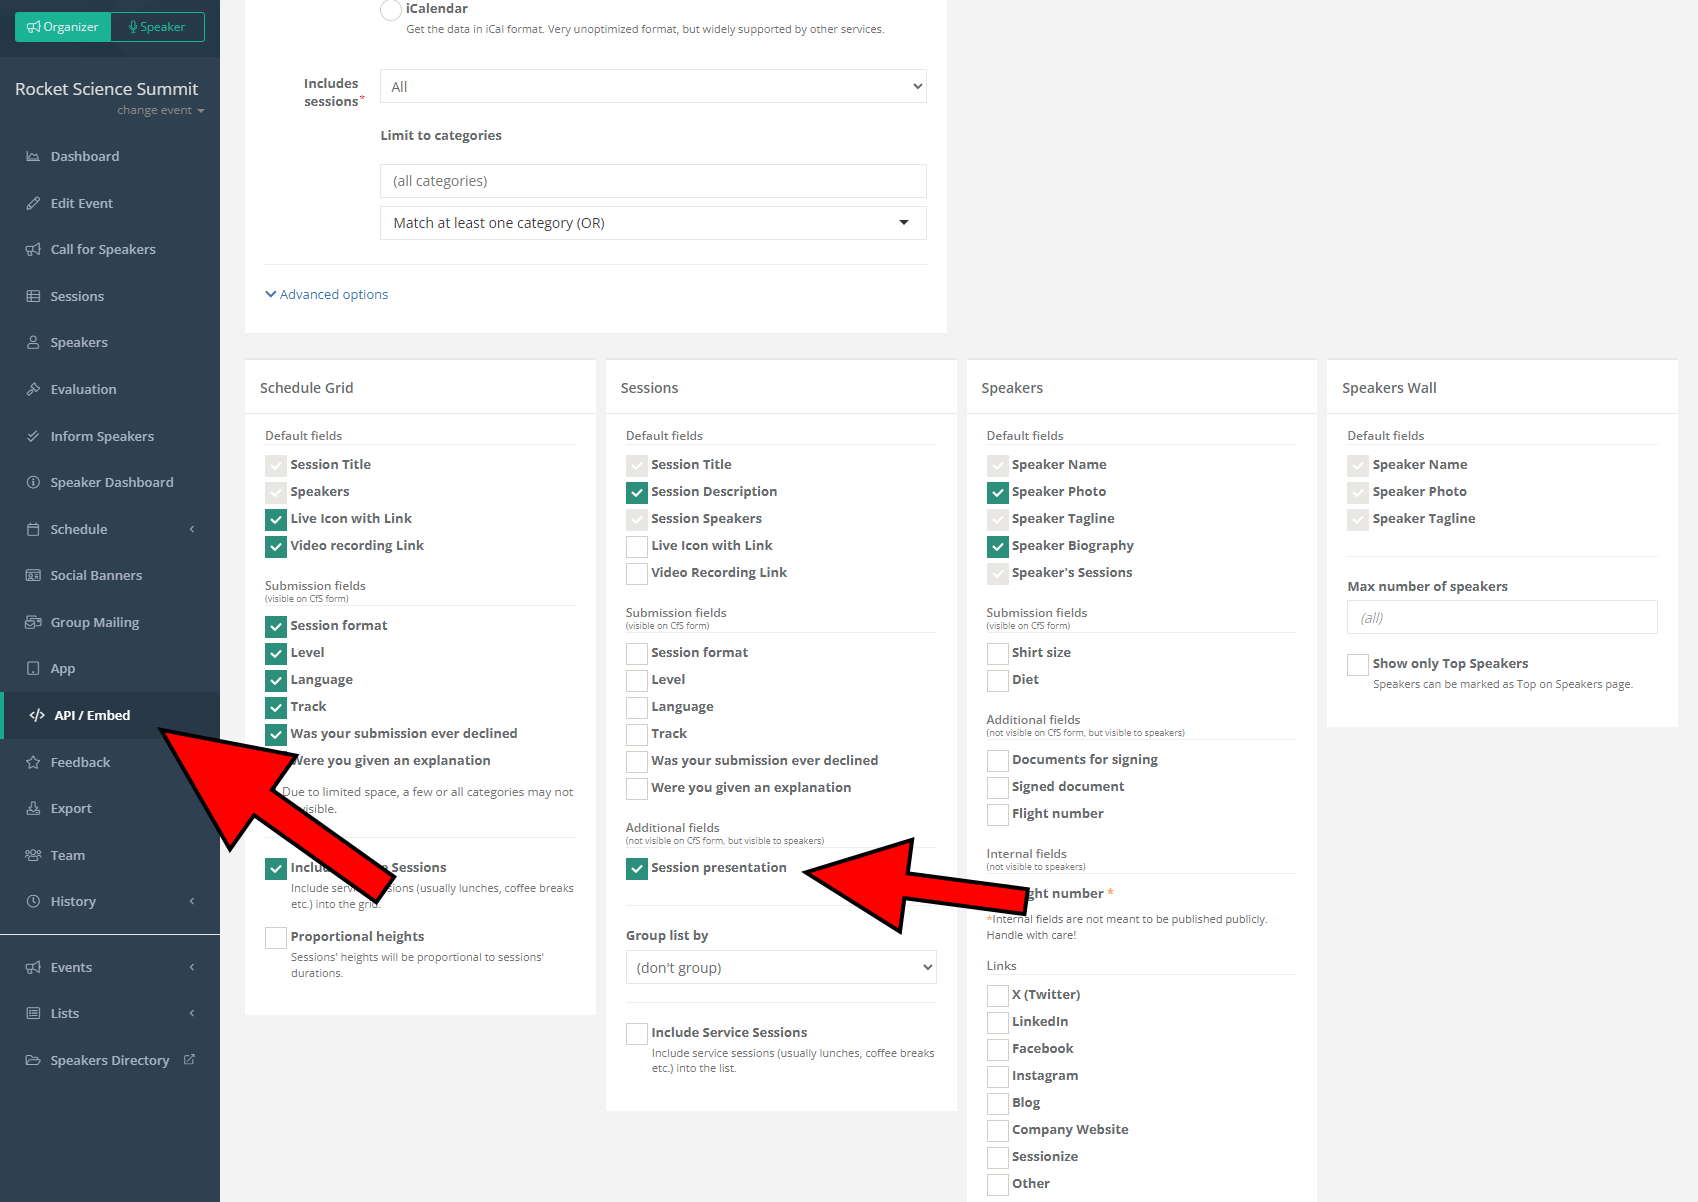
Go to the API / Embed page
Open an existing endpoint or click Create new endpoint
Scroll down to the Sessions section at the bottom of the page
Under Additional fields, tick the checkbox next to Session presentation (or whatever you named the field)
Click Save changes (for existing endpoints) or Create endpoint (for new ones)
The presentation will now be accessible to attendees who view the session details in the embedded schedule or session list on your website. If you're using a JSON or XML endpoint, the file will appear as a custom field in the session data.
Custom fields are not enabled by default in API and embed endpoints. You have to explicitly enable each field you want to expose. This is by design, to prevent unintentional exposure of sensitive data.
Step 5: Share presentations through the event app
If your event uses Sessionize's built-in mobile and web app, you can make the uploaded presentations available there as well.
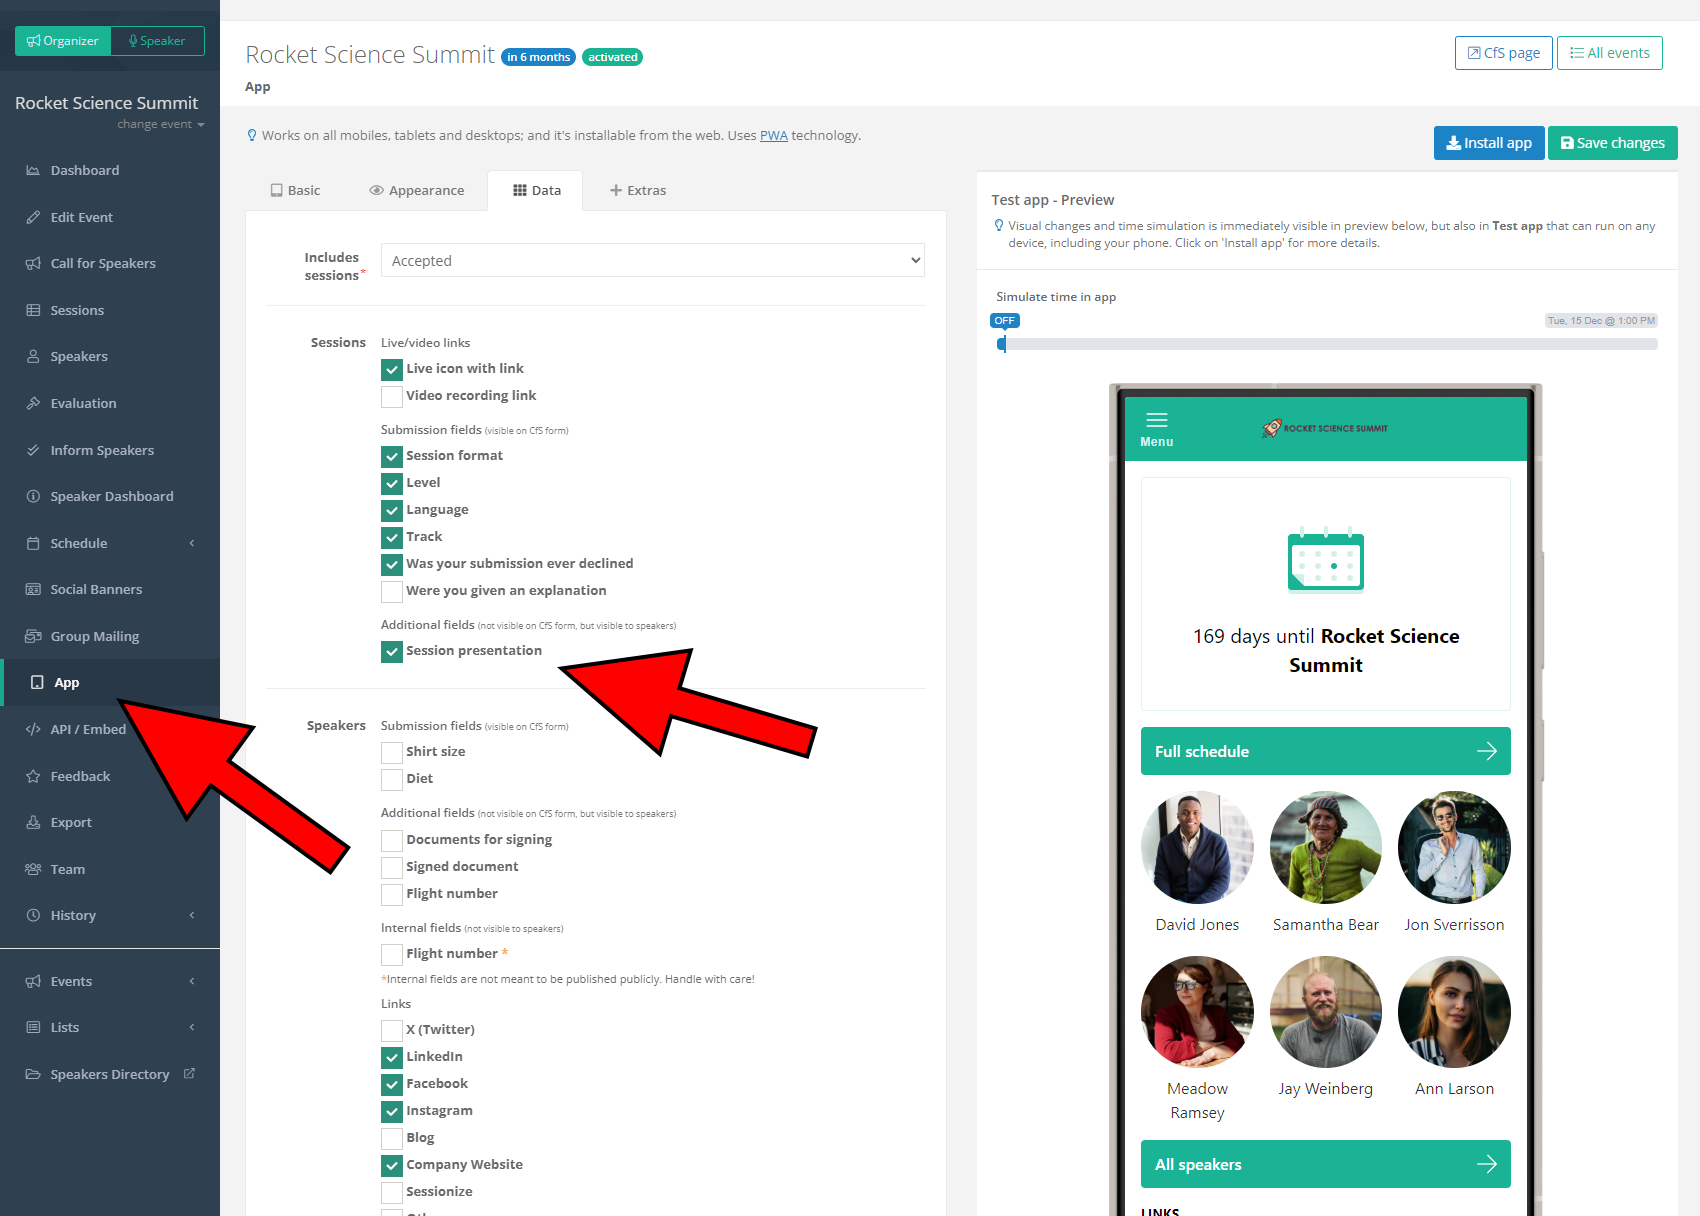
Go to the App page
Switch to the Data tab
Under Sessions, find Additional fields and tick the checkbox next to Session presentation (or whatever you named the field)
Click Save changes
Attendees using the event app will now be able to access the presentation when viewing the session details.