By design, Sessionize doesn't automatically inform your speakers of any changes to their session status, nor can they see the session status in their speaker profile until you manually inform them about it. Because of that, you have the possibility to change your mind as many times as necessary and fine-tune your event's accepted session list until you're completely satisfied with it.
Of course, there's no need to delay informing your speakers until your entire schedule is ready. For those you're sure about, you can inform them about their session status right away.
Only the session owner will receive a message about whether the session has been accepted, declined or waitlisted. Following the single responsibility principle, each session must have only one person (session owner) responsible for it. That person is in charge of all session-related communication with the event organizer, including the confirmation of participation. To learn about the difference between a session owner and session speaker, please refer to the following article: Session owner and session speaker, what's the difference?

Informing speakers about their session status by sending them a message via the Inform speakers page is very important. If you skip this step, your speakers will permanently see their session status as “In Evaluation” in their speaker dashboard, which some of them could find confusing.
After they've been informed, they will have the option to confirm their participation by clicking on the appropriate button in the email message you sent through the Inform speakers page.
While getting a confirmation is the best way to make sure you can count on the speaker and their session, please keep in mind that it ultimately comes down to the human factor. It's possible that some speakers will forget to confirm their participation while fully intending to participate in your event. Following up with a reminder might be required.
Customize the accepted/declined/waitlisted session message

On the Inform speakers page, you'll find two tabs containing a list of accepted, waitlisted, and declined sessions. On the right, you can see a message that will be sent to speakers whose sessions have accepted, declined or waitlisted. You can use our predefined message or edit it to your liking.
You're welcome to use the variables listed below the message box to insert the respective values. The variables are slightly different depending if you're sending an accepted, declined or waitlisted message. You can quickly add them to your message by clicking on them to copy them to the clipboard and pasting them into the message.
The best way to check if the message you're about to send to your speakers to inform them about their session being accepted or declined is to send a test version of the message to yourself. To do so, use the Save & Test button found below the message box.
Decide who to inform and send the message(s)

There are several ways to select who you want to inform about their session status:
- Manually click the checkbox next to everyone you want to inform on both the Accepted sessions, Waitlist and Declined sessions tabs
- Quickly select or deselect everyone on the list by using the appropriate buttons above the list
- Use the Only sessions in dropdown menu. This filters the sessions by single or multiple choice categories you added to your custom submission fields, additional fields, and internal fields when setting up your event. The filtering options are particularly useful for events with many submissions
To find out how to use custom fields to better manage your event, please read the following article: Submission fields, Additional fields, and Internal fields explained.
Once you're completely happy with your speaker selection and message, click the green Send # emails button ("#" being the number of selected speakers).
The session owner will only receive a single email informing him about their sessions being declined, even if they submitted multiple sessions. This is by design; you generally don't want to overwhelm them with multiple rejection emails, so it's more appropriate to have all declined sessions listed in a single message.
Contrary to that, the session owner will receive a separate email for each one of their accepted or waitlisted sessions. To see the acceptance message and the following steps from a speaker's perspective, scroll down to the bottom of this article.
_Embed Adding feedback to declined sessions
Adding feedback to declined sessions Before informing your speakers about their s
Adding feedback to declined sessions
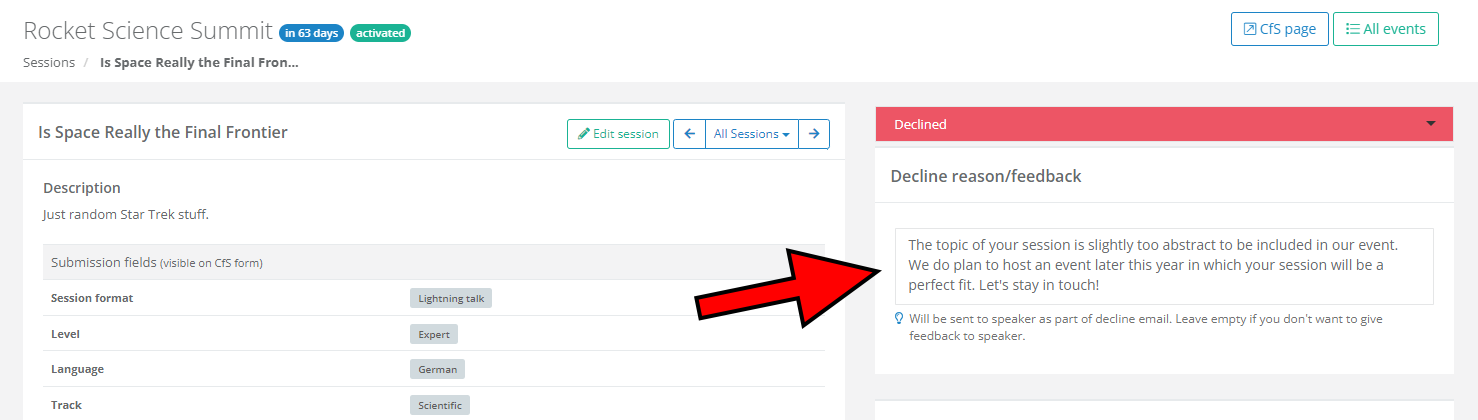
Before informing your speakers about their session being declined, you have the option to explain such a decision. Your feedback will be added to the decline message and, in most cases, greatly appreciated by the speaker.
To add a decline reason/feedback, simply open the session you decided to decline and enter your feedback into the Decline reason/feedback box. The text is saved and included with the decline message automatically.

The Declined sessions page will clearly show you for which sessions you've added feedback (checkmark), and which are left with no feedback (X).

This is an example of an email that the speaker whose session(s) you declined will receive if you provided feedback in the aforementioned Decline reason/feedback box.

If you leave no feedback, the speaker will receive a generic email about their session being declined, as shown above.
Manually mark as informed or confirmed
If you informed your speaker about their session being accepted, waitlisted or declined in some other way, you can manually mark that speaker/session as informed. There are several ways of doing so.
By opening an individual session
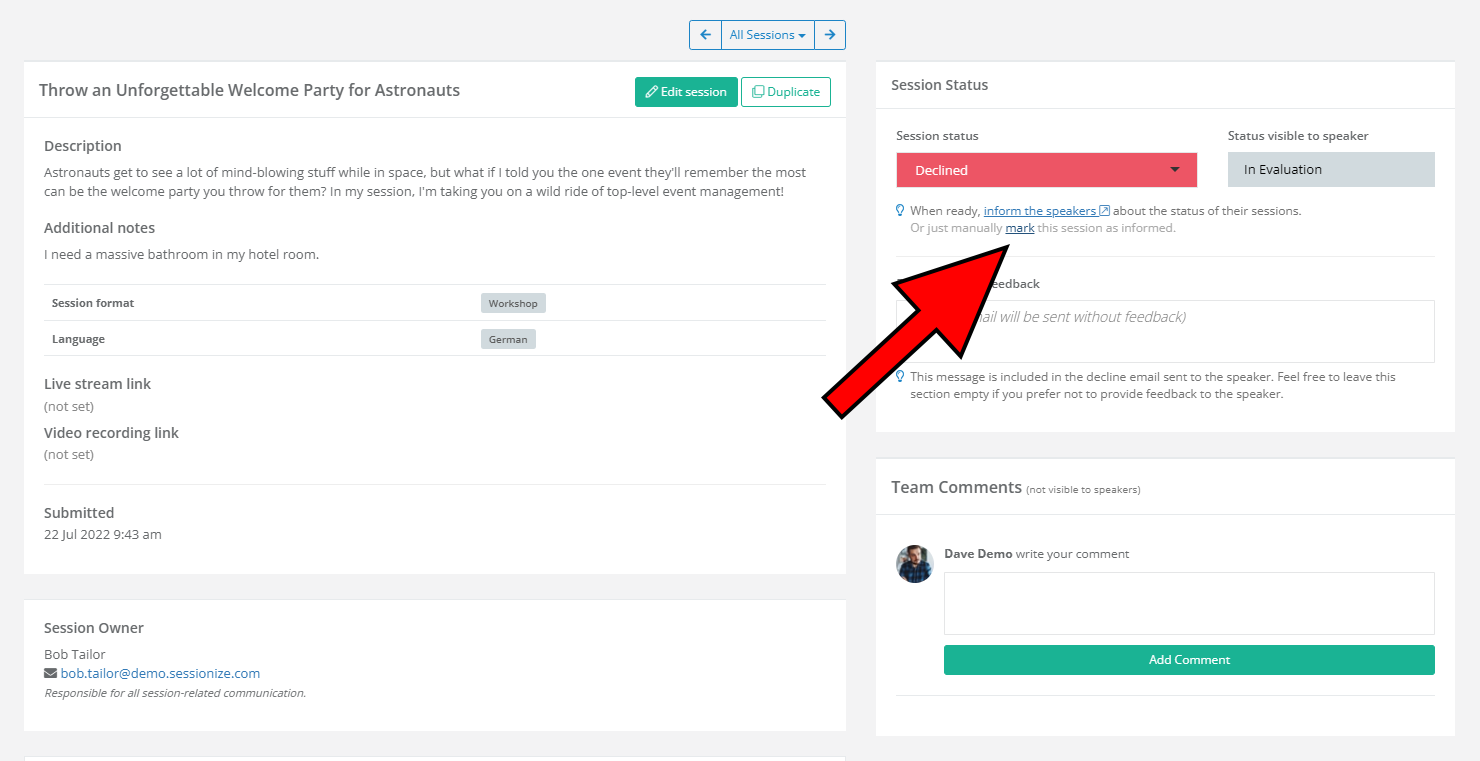
To mark an individual session as manually informed, simply find the session on the Sessions page, open it, and click the appropriate link below the session status, as shown in the screenshot. This approach works regardless of whether the session in question was accepted or declined.
On the grid overview (only for accepted sessions)

If you're marking a session that was accepted as manually informed, visit the Informed & Confirmed tab on the Sessions page and click on the not informed button.
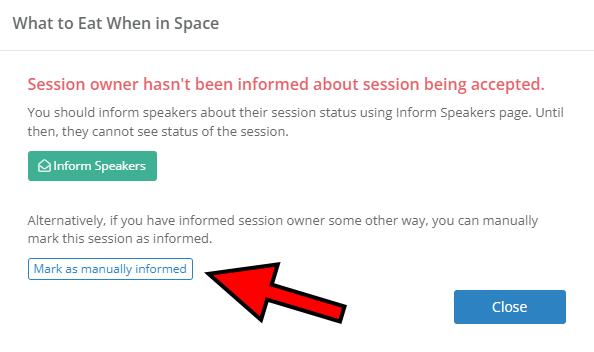
Afterward, click the Mark as manually informed button. Then you can use the same procedure to mark the speaker/session as manually confirmed.
In bulk

To mark multiple sessions as informed or confirmed, select the desired sessions and click the blue Inform / Confirm button. You'll be given the option to inform speakers in the most appropriate way, by sending messages about their sessions being accepted, waitlisted or declined, and we'll take you to the Inform speakers page, where you'll see the sessions you've selected in the previous step.
However, if you insist on marking sessions as informed and confirmed manually, use the other two options: Mark as Informed and Mark as Confirmed. Select the preferred action and proceed by clicking the green Mark X sessions as Informed/Confirmed button. Wait for a short countdown, and confirm by clicking Apply changes.
There are a couple of details to keep in mind:
- A session has to be accepted, waitlisted or declined before you can mark it as informed
- A session can be confirmed only after the speaker has been accepted and informed
- You cannot change the inform/confirm status of a session after the speaker has already been informed
You should always strive to inform the speaker about their session being accepted, waitlisted or declined through the Inform speakers page instead of manually marking sessions as informed.
Don't want to use our inform/confirm system?
If you don't want to use our inform and confirm logic, or you plan to inform your speakers but don't want to insist that they confirm their participation in your event, remember to adjust the API / Embed and App settings appropriately.
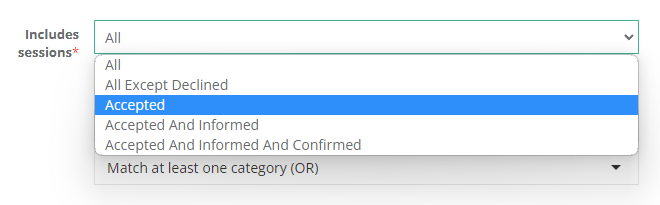
On the API / Embed page, open your desired endpoint and look for the Includes sessions dropdown menu.
- If you plan to inform your speakers but won't ask them for confirmation, use the Accepted And Informed option
- If you don't plan to inform your speakers (highly inadvisable), use the Accepted option
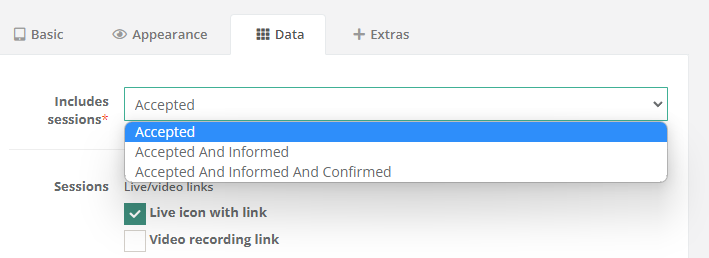
Similarly, in the Data tab of your App page, look for the Includes sessions dropdown menu at the very top.
- If you plan to inform your speakers but won't ask them for confirmation, use the Accepted And Informed option
- If you don't plan to inform your speakers (highly inadvisable), use the Accepted option
These steps are important to follow. Otherwise, your embeds and/or app won't have anything to show.
You should always inform the speakers about their sessions being accepted or declined. If not informed, speakers will permanently see the status of their sessions as “In Evaluation” in their speaker dashboard.
Find out who confirmed (and who didn't)

To find out who was informed about their session being accepted, who confirmed his participation, and who you yet have to inform, visit the Informed & Confirmed tab on the Sessions page. You can click on the last column's title to sort the sessions and speakers by their current status.
If a speaker isn't confirming their participation for a longer period of time, you might want to consider resending the acceptance message. To do so, click on the last column of the desired session, select Preview message, and click Resend.
Speaker's perspective: Confirming participation
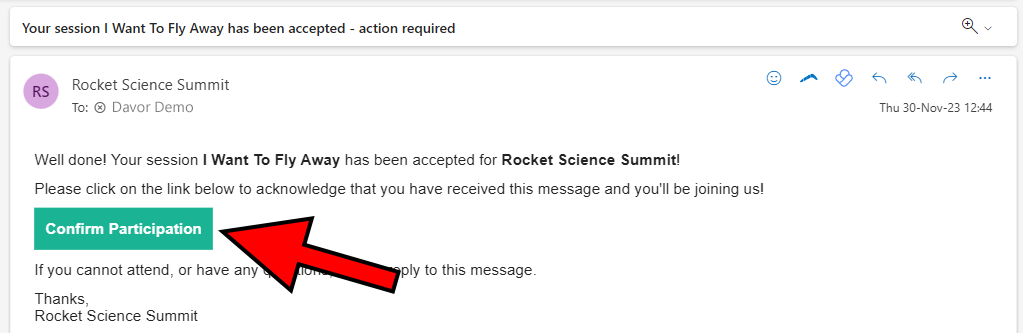
If your session is accepted, you'll receive an email with a Confirm Participation button, which you should click to let the organizer know that you in fact plan to participate in their event.
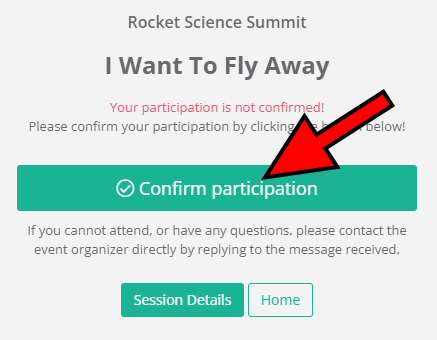
After clicking the button from the email, click Confirm participation on Sessionize's website and that's that. The organizer will know they can count on you and proceed to schedule your session.
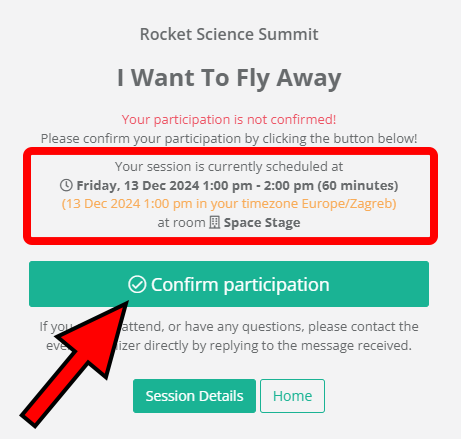
If the organizer already scheduled your session after accepting it, all the relevant details, such as the exact date, time, and room, will be displayed. Before clicking the Confirm participation button, make sure that you can fit the planned date and time into your schedule.