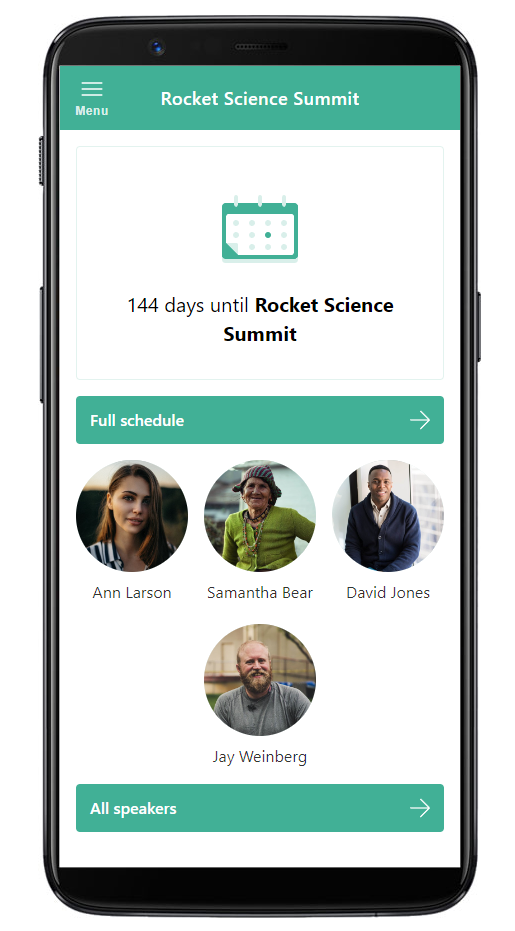
For every event, Sessionize can create a mobile and web application. Your attendees will find it useful to keep informed about the event's schedule, build their personal schedule, check session and speaker details, and favorite sessions and speakers they don't want to miss. The app can be installed on mobile devices and is accessible through the web, meaning it can be used on a tablet, computer, or any other device with a web browser, too.
Here are some of the features and benefits of the app you can create for your event:
- Let your audience build a personalized schedule, check various event details, and favorite sessions and speakers
- Choose which session and speaker data fields you want to share
- Customize in-app colors, logo, and icon
- Add an RSS channel with news related to your event
- Add links relevant to your event, such as the event website and sponsor links
- Doesn't require Google Play Store/Apple App Store certification to be published or used
- App updates are instantly live
- Check app behavior in a simulated timeline preview to avoid any surprises when your event starts for real
- No hidden fees of any kind for app creation and/or usage
The app is built using Progressive Web App (PWA) technology. Thanks to that, it requires no Google Play Store or Apple App Store certification, and all of your updates are instantly live. Make sure your attendees look for it on the URL you selected for it and not in Google Play Store/Apple App Store.
Sessionize provides intuitive tools to help you create and test your mobile and web scheduling app within minutes. Let's go over the entire process step by step! If you just want to get a better idea of what you can expect from the finished app, please check out our demo.
Start building the app
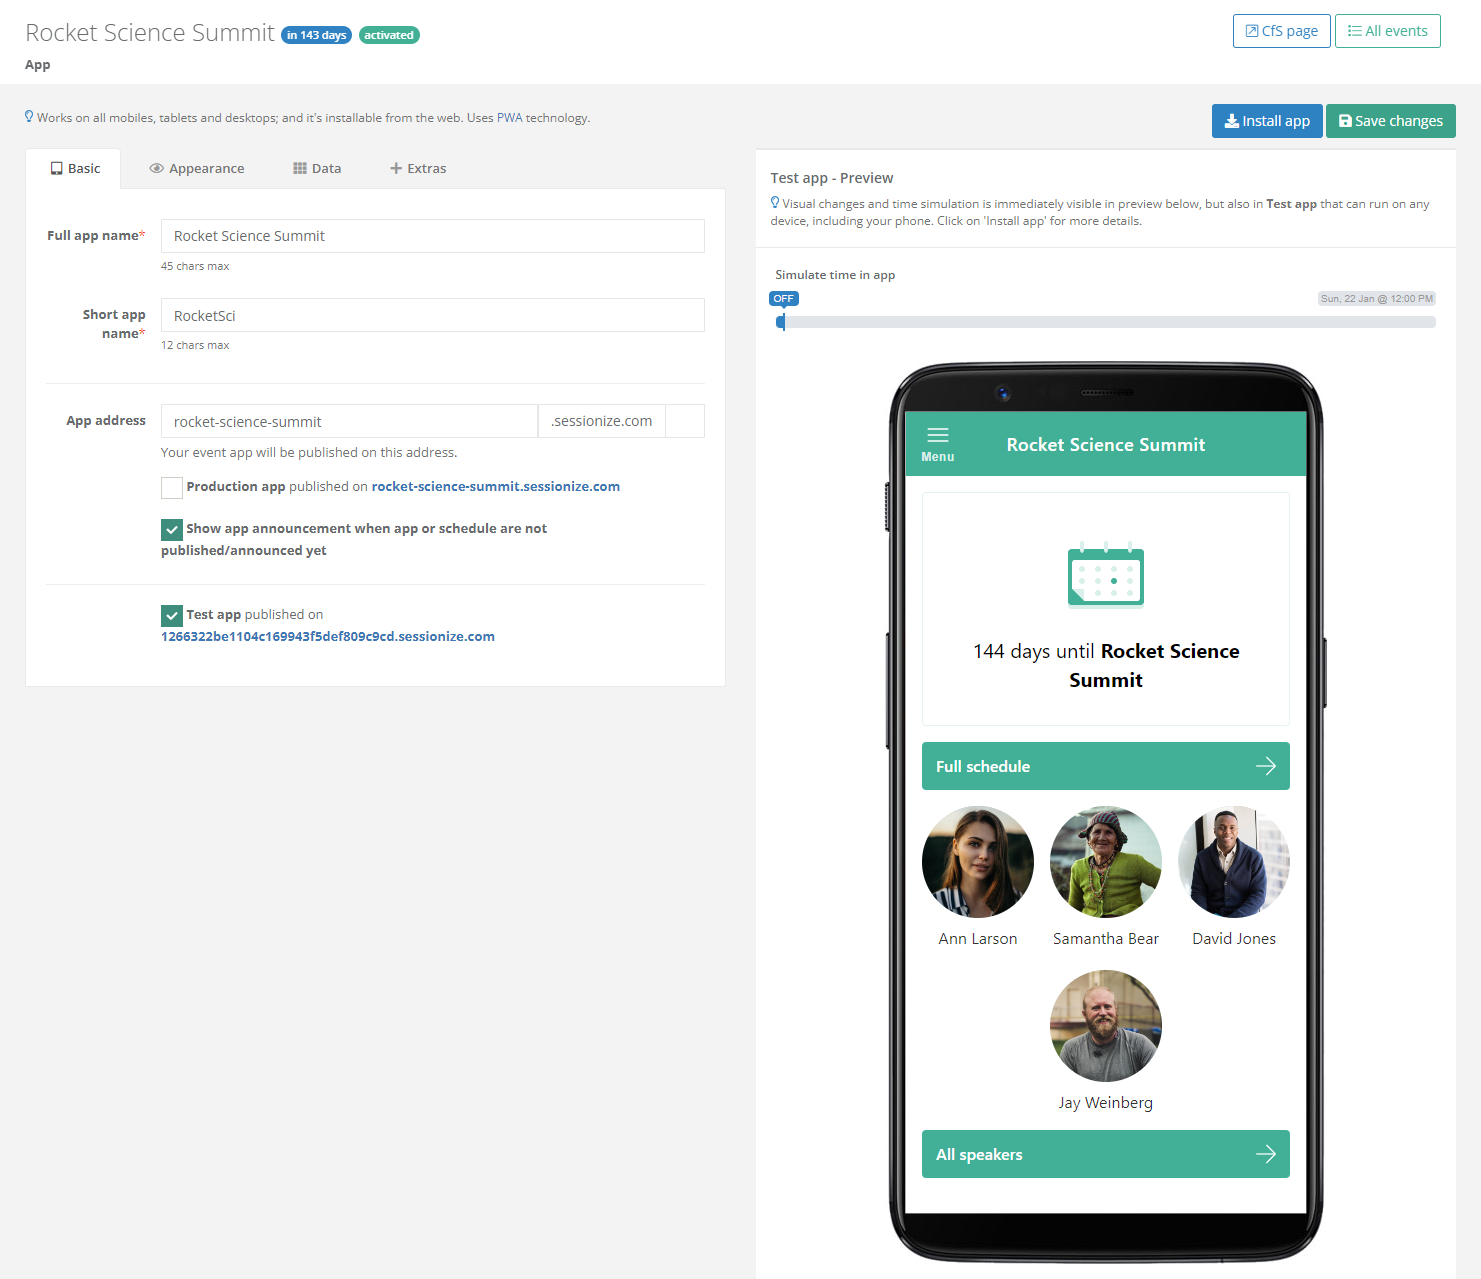
To start creating an app for your event, open the App page. You'll be greeted with a box split into four categories, where you configure the app's settings and a real-time preview of the mobile app.
Enter the basics
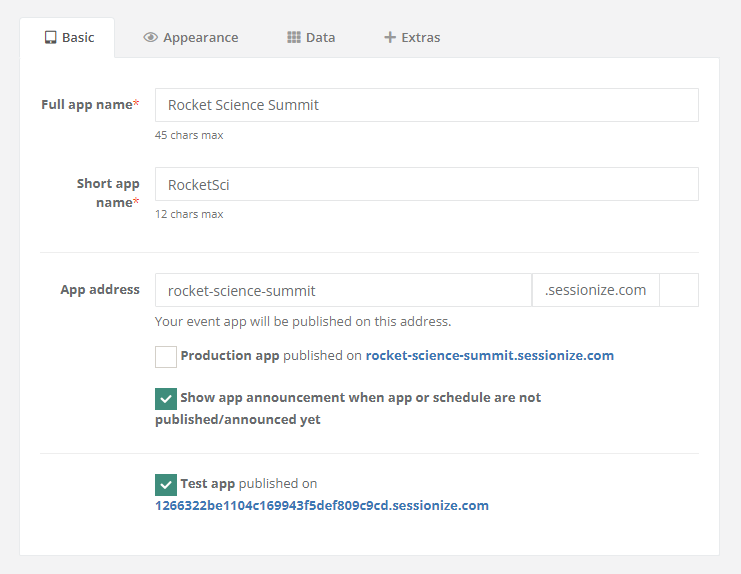
Start by entering the full and short app names in the Basic tab, as well as the web address through which the app will be accessible to your attendees.
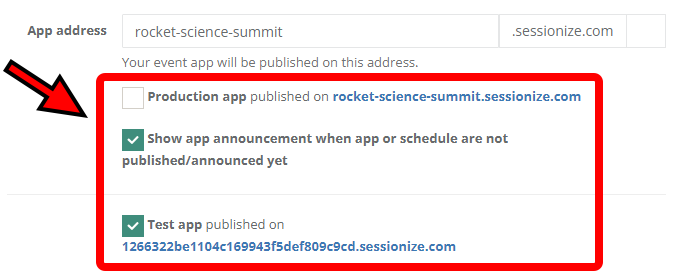
If you want to publish your app for testing purposes, tick the Test app published on… checkbox and click Save changes on top of the page. Sessionize generates a random URL that isn't likely to be guessed by anyone who shouldn't see the app before it has been completed. Look for the test URL below the aforementioned checkbox. You can access it from any mobile or desktop device.
Tick the Production app published on… checkbox only after you're completely done setting up the app and are happy with the results. Doing so and clicking Save changes publishes the app on the URL you entered, making it accessible (and installable) for everyone with the URL.
Adjust the appearance
The Appearance tab lets you intuitively adjust the colors of your app, add a custom logo and icon, and set a date and time format. All relevant time and date formats are available for you to pick from. Don't forget to click Save changes once you're done setting everything up.
As soon as you change the appearance of your app, your modifications will be immediately visible in the preview as well as in the published test version of the app. That way, you can observe the changes to your app both in the preview window as well as on the mobile device you're using to access the test website.

Expecting attendees from other countries? Tick the Show schedule in user's local timezone box to make the app more user-friendly for such users.
To highlight the best speakers and display them above others on your app's homepage, visit your event's Speakers page and tick the Top checkbox next to appropriate speakers. Another way to do the same is to edit the speaker, tick the Is top speaker of this event? checkbox and click Save changes.
Select the data you want to include
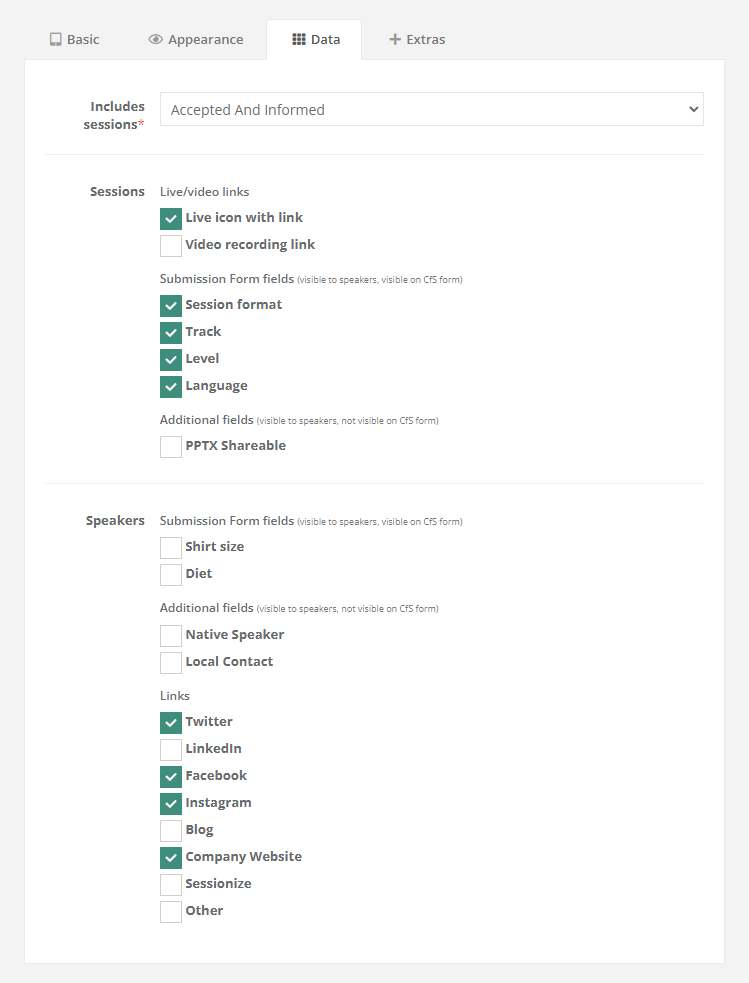
The Data tab is where you have to decide which sessions to include in your app.
Keep in mind you must schedule the sessions to see them and the corresponding speakers in the app, regardless of your choice. The options are:
- Accepted - sessions that are accepted without the speaker necessarily being informed
- Accepted And Informed - sessions where speakers are informed about their session's acceptance
- Accepted And Informed And Confirmed - sessions for which the speakers have confirmed their participation
The Data category also lets you select the session and speaker data you want to include within your app. You can include any session and speaker data fields, as defined on the Edit event page when setting the event up. Of course, the visibility of the selected data within your event's app is directly dependent on the data actually being entered in the appropriate session and speaker fields.
Learn about the purpose and differences between submission form fields, additional fields, and internal fields in the following article: Submission Form Fields, Additional Fields, and Internal Fields Explained.
Add an RSS feed and links
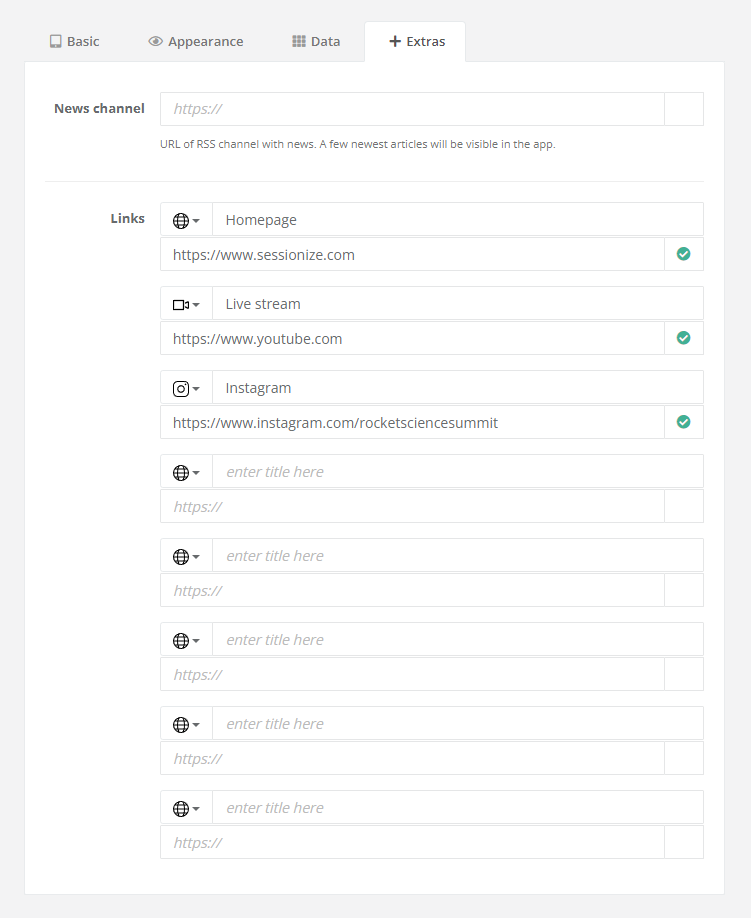
The Extras tab enables you to add an RSS news feed and various URLs to your event's app.
RSS is a web feed that allows users and applications to access updates to websites, such as news articles, in a standardized format. Many web-building systems, such as WordPress, generate an RSS feed by default. Not sure if your website has an RSS feed? Consult your web editor to find out!
To make the URLs more distinguishable and your app easier to navigate, we've added a set of icons for you to use. Simply click on the icon next to the URL title to access the extra icons and change the default one. Confirm everything by clicking Save changes on the top of the page.
Run a simulation of your app
After everything's been adjusted exactly as you wanted, you can use the app preview window to check if you're happy with the results. We also built a timeline simulator that's going to show you what the app is going to look like in the days leading up to your event, during the event, as well as after the event is over. To use it, simply slide across the timeline and stop at the desired day and time. A moment later, the app will update itself to reflect the simulated date and time.
Our live preview and timeline simulator don't only give you a mere visual representation of your app; you can (and should) test its full functionality, too. Feel free to click around the menus, experiment with favorites, and generally act as if you're using the app for real. What you see here is exactly what you'll see once you install the app on your mobile device or access it through a web browser. You can observe the changes on your mobile device, too, if you're using a test version of the app. Any time changes on a simulated timeline are immediately applied to the test app, both in the preview box and on your test device.
Publish and install the app

Once you get everything up and going, the only remaining thing to do is to publish the app. This is done by ticking the Production app published on… checkbox in the Basic tab and confirming it by clicking Save changes.
To access the app, your attendees should visit the web address you published it on. Once there, depending on their device, they'll be offered to install the app or use it through a web browser. Make sure you inform your attendees about the web address of your event's app. Sessionize even generates a QR code, which you can print on your accreditations, show on screen during the opening ceremony, or utilize in various other ways to access the app quickly. Grab it by clicking on Install app, followed by Show QR code.
Be careful not to share the test app URL or QR code with your event's attendees, as it is supposed to be used exclusively for testing and has a limited number of users. Your attendees should only get access to the production app.
Bonus tips
Here are two handy tips which you can share with users of your event's app to make their experience even better.
Sync favorites between devices
The app doesn't require your attendees to log in with a username and password, but they can still synchronize their favorites between two devices. To do so, they have to select Sync favorites from the app's Menu on their main device and click on I don't have the sync code. The app will then automatically generate a 6-digit code valid for 10 minutes. Within those 10 minutes, access the app on your second device, select Sync favorites from the Menu, click I want to use my sync code and enter the 6-digit code you just generated.
Switch to dark mode
No app worth its salt goes without a dark mode, does it? Open the Menu and tap the sun icon. Voilà - the dark mode is on!
Check the number of favorites
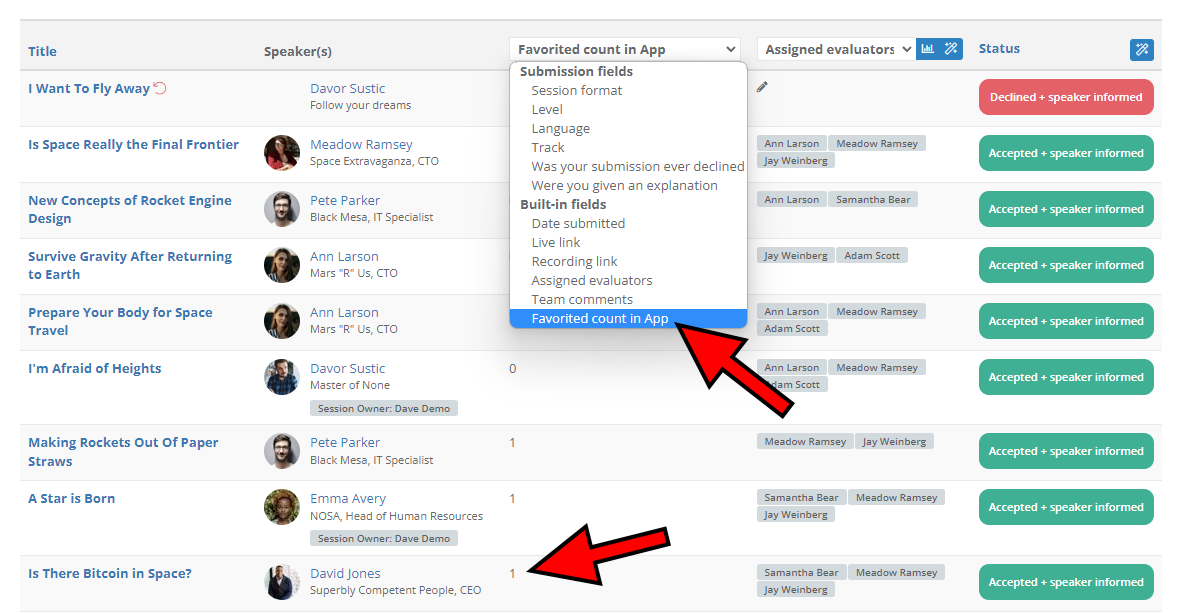
You can easily check the number of times a particular session has been favorited by people using your event's app. Visit the Sessions page and select the Favorited count in App option from the dropdown menu. The corresponding number of favorites will show up next to every scheduled session.