The best way to schedule sessions, especially for events with a larger number of sessions, is to use our Schedule builder.
However, scheduling sessions can also be done manually, through your event's Sessions page. If you're creating a user group rather than a traditional event, manual session scheduling is the only available option.
Learn how to use our Schedule builder in the following article: Schedule builder: Tips and tricks.
Select the session you want to schedule

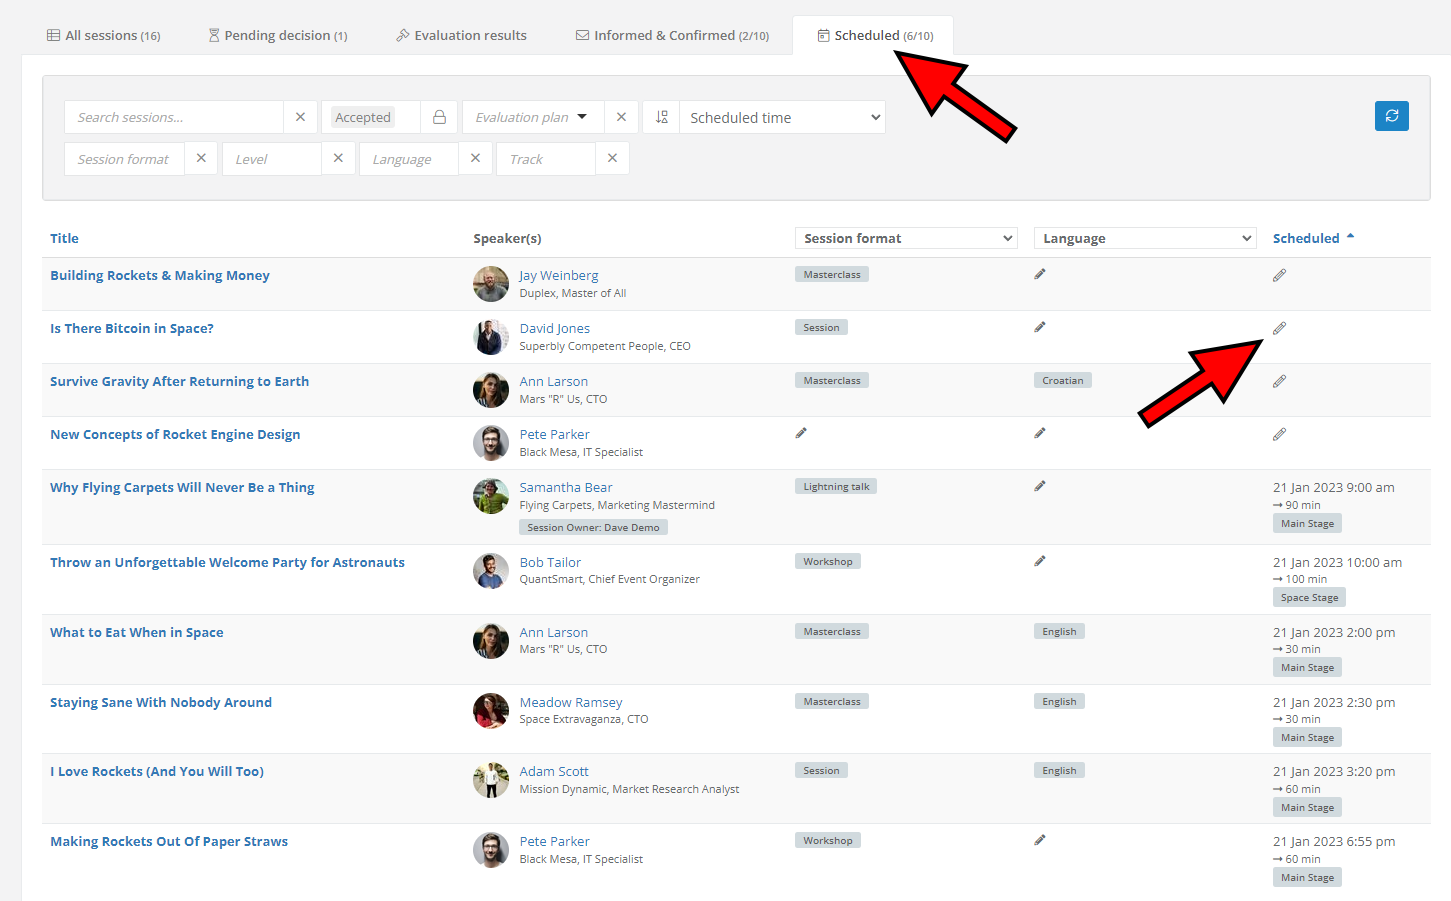
Access your event's Sessions page and switch to the Scheduled tab. Look for the session you want to schedule and click on the pencil icon in the Scheduled column. This will open a window where you have to arrange a schedule for the selected session; the same process must be repeated for every session you want to schedule individually.
Not seeing a session in the Scheduled tab? Only accepted sessions can be scheduled. Check the session status on the All sessions tab of your event's Sessions page.
Choose room, date, time, and duration

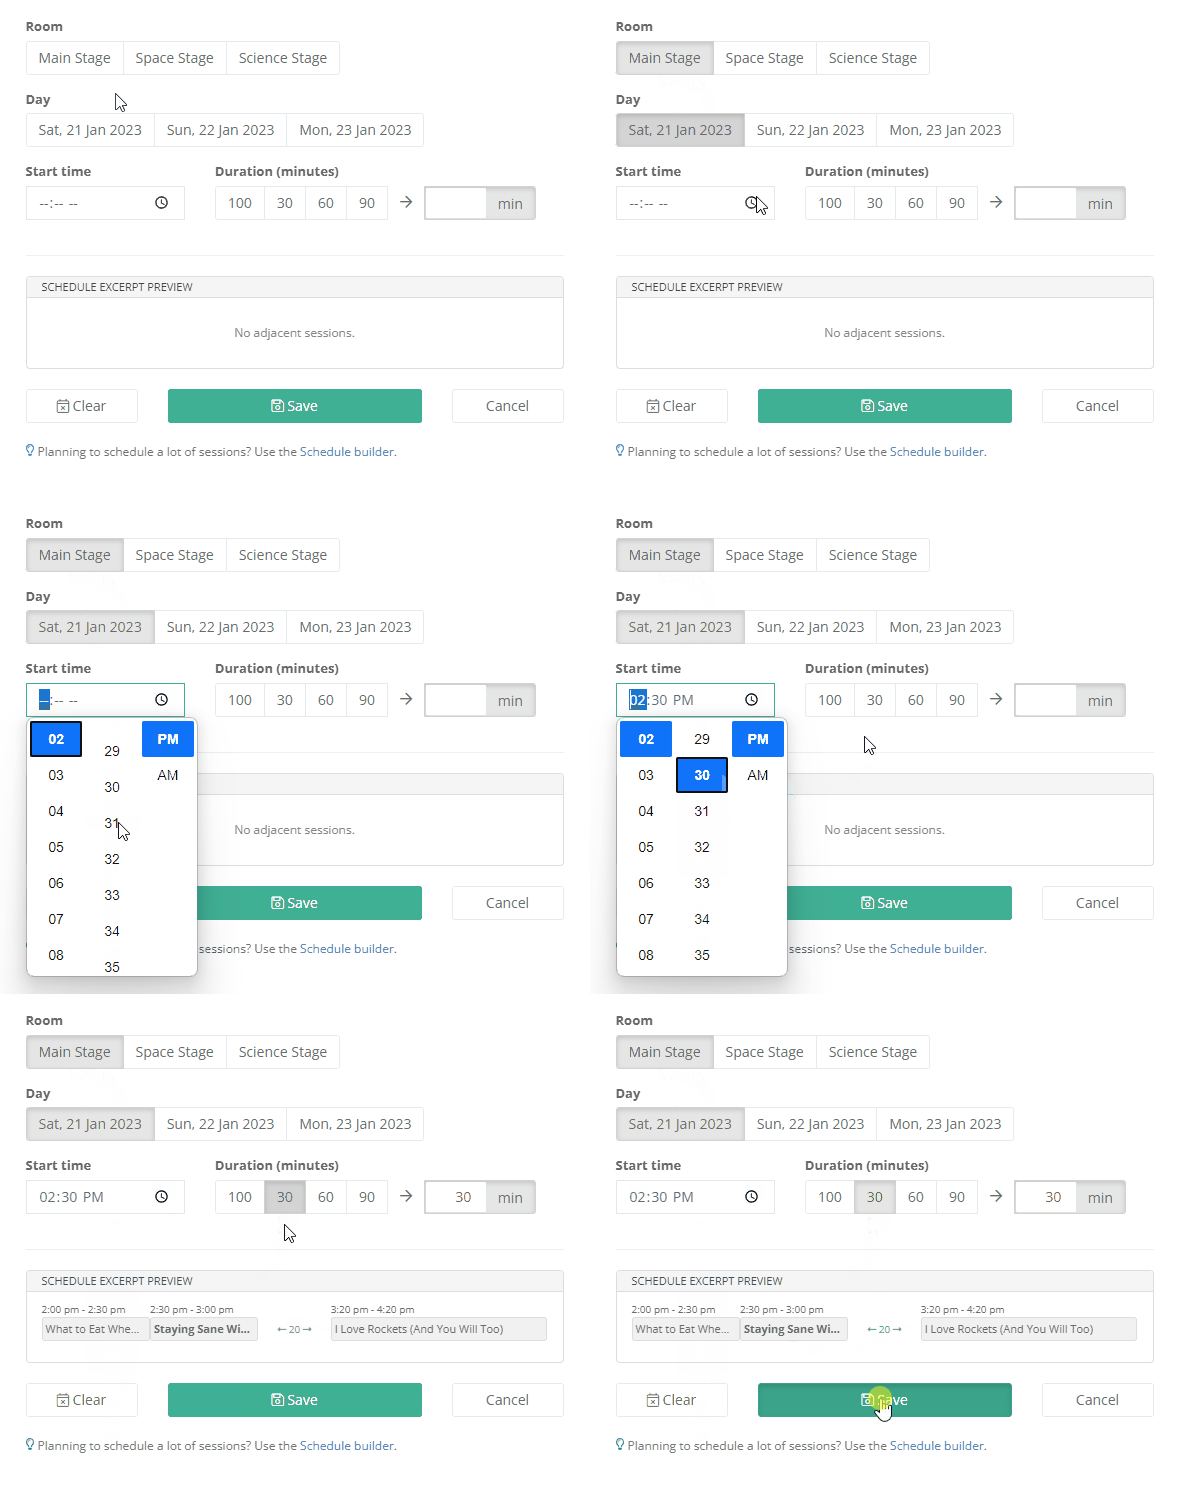
To manually schedule a session, select the room (as defined on the Rooms page), date, start time, and duration.
A moment later, you'll see a schedule preview, showing the current session and adjacent scheduled sessions, if they exist. You'll be notified of any scheduling overlap, but you have to fix such issues manually by rescheduling the appropriate sessions.
Once you're done, click Save to finish scheduling the session.
To schedule service sessions (registration, coffee break, lunch, and similar), as well as add plenum sessions (sessions that visually extend over all rooms), please use our Schedule builder.
