Event organizers can edit everything related to their event without restrictions or limitations. That includes sessions (title, description, owner, etc.), speakers (photo, tagline, biography, etc.), as well as all predefined and custom fields (submission fields, additional fields, and internal fields). No part of the event can be made inaccessible to its organizer, and you even have the luxury of leaving the required session and speaker fields empty if that suits you best at the given moment.
There are only two things an event organizer cannot change: speaker name and email address, as they're essential elements of a speaker's account. If your event has a manually added speaker, their name can be changed by the organizer.
Find out about the three types of custom fields and how to use them in the following article: Submission fields, Additional fields, and Internal fields explained.
Sessions and speakers can be edited in three ways:
- Grid edit - great for quickly entering or editing large amounts of data for multiple sessions on the same page
- Bulk edit - an intuitive way of changing data fields for multiple sessions or speakers at once
- Single edit - a traditional way of editing each session and/or speaker separately
Editing data in a grid view
Grid view offers the quickest and most practical way to edit all session and speaker-related data. It is especially useful when you want to make many changes to the existing data, i.e., add recording links or mass-edit entire data categories.
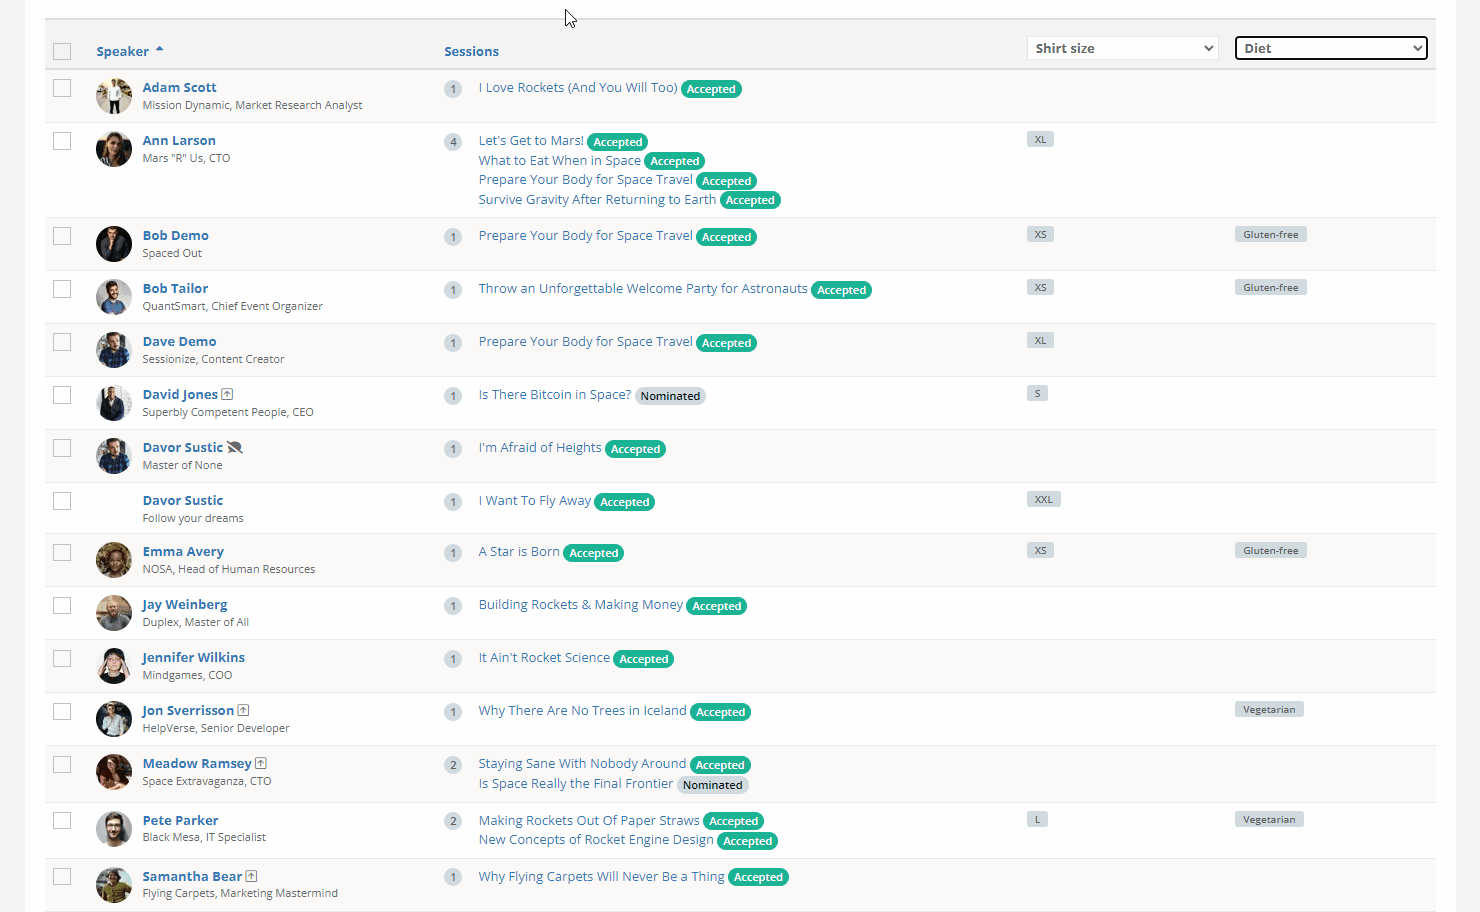
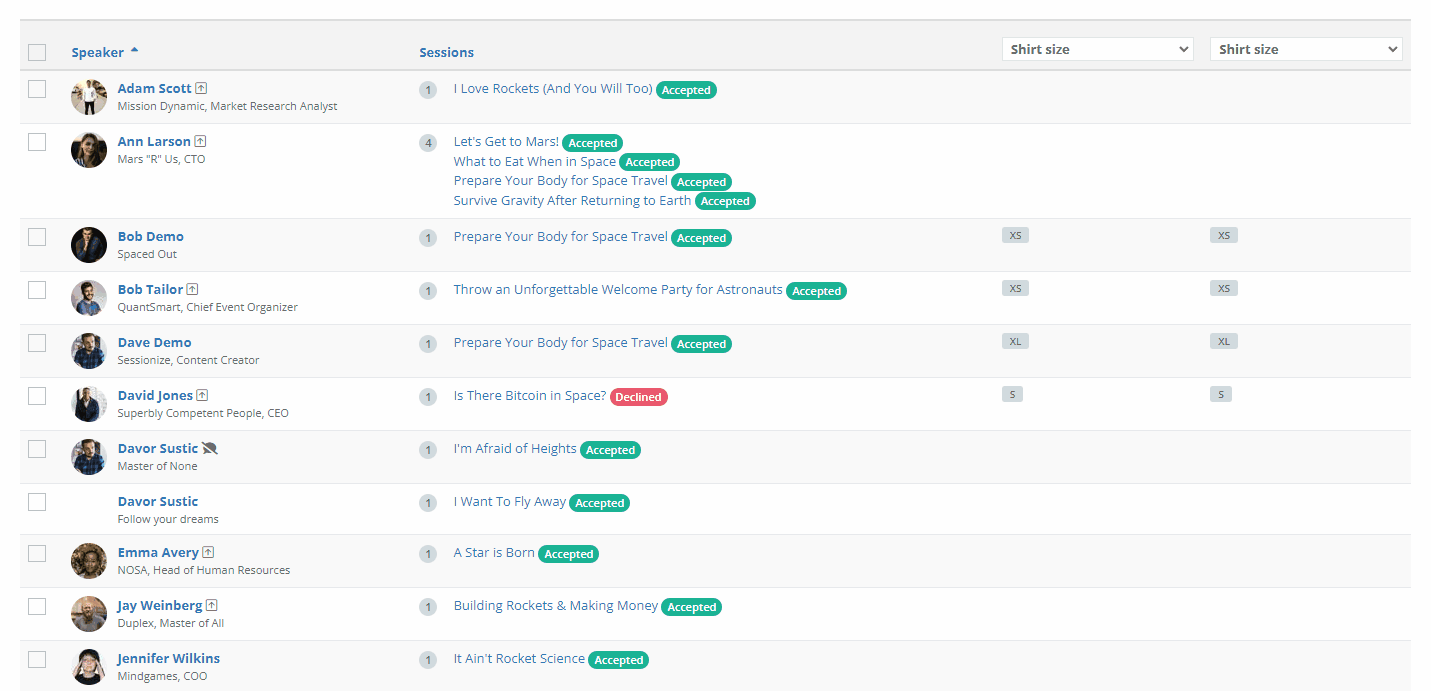
Grid view is available both on the Sessions and Speakers pages, where you can use the two columns and the accompanying dropdown menus to select the data you want to add or edit.
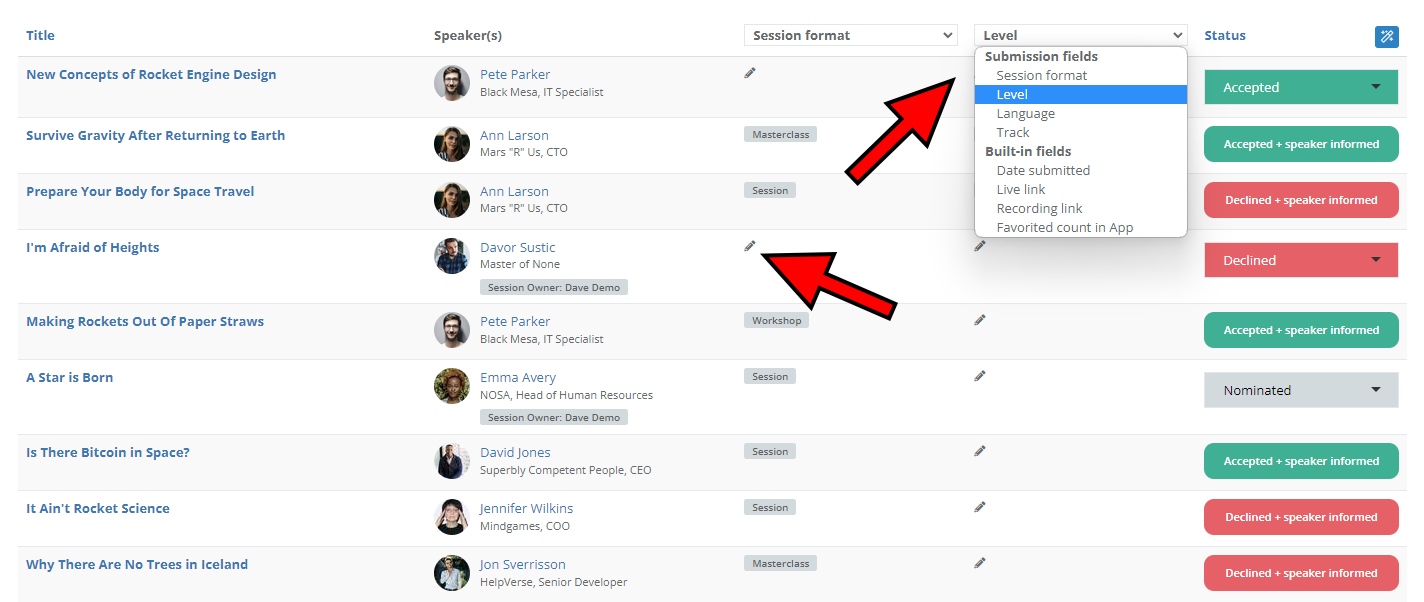
After selecting what data you want the columns to show, editing or adding it comes down to clicking the existing data to edit it or clicking the pencil icon to add new data.
Editing data in bulk
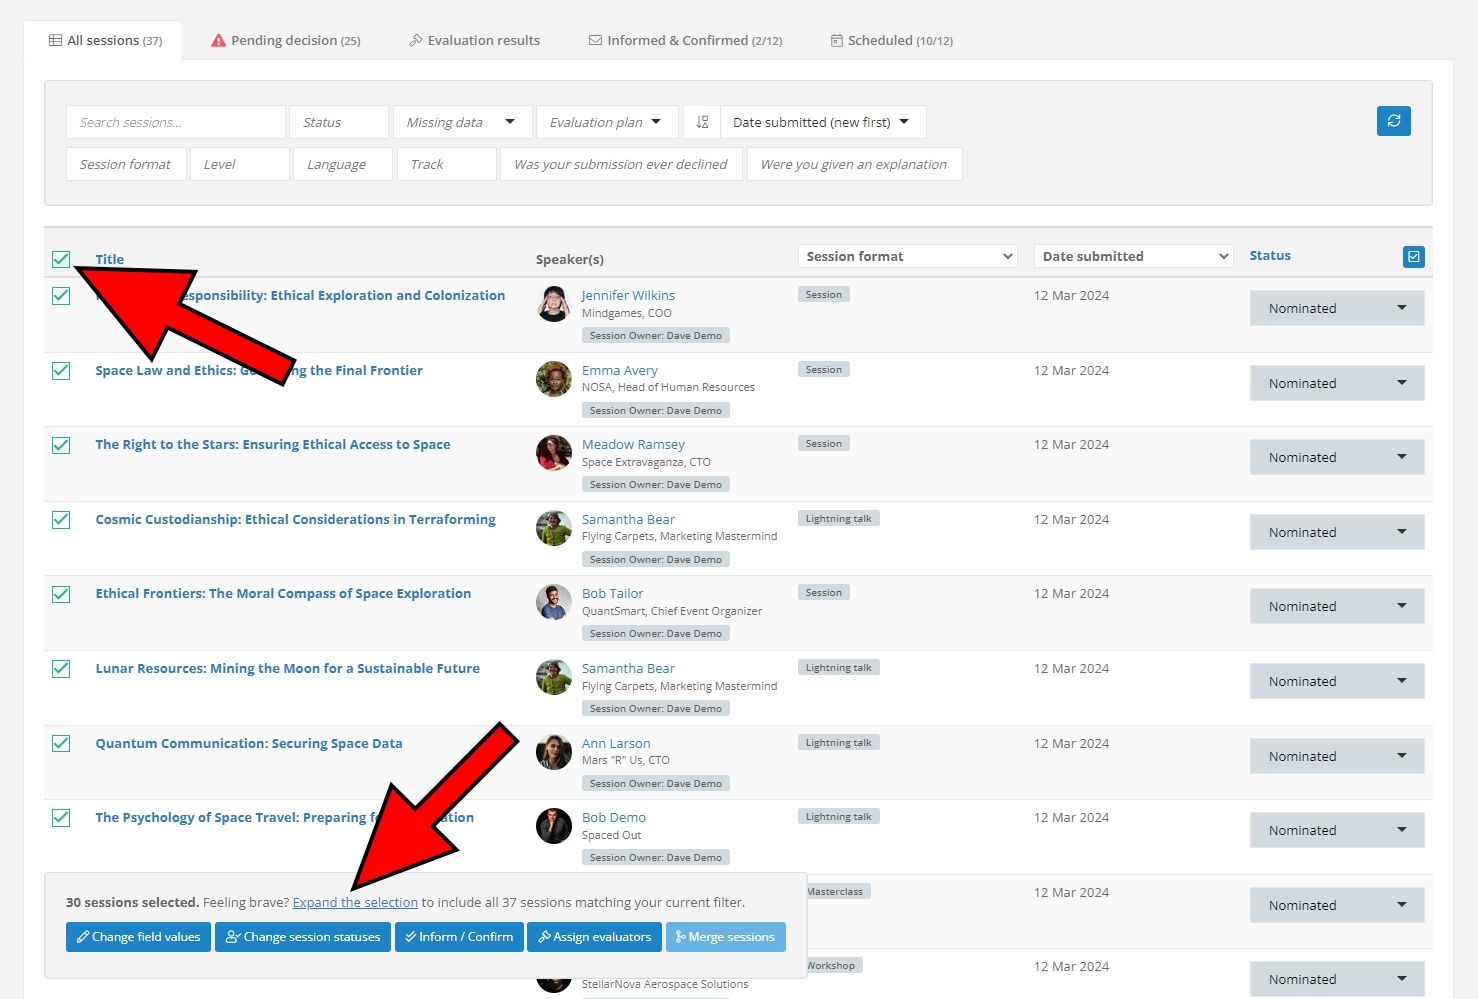
To edit session or speaker data in bulk, click the checkbox at the top of the session/speaker list to select all sessions/speakers on the first page of the Sessions or Speakers page. To expand your selection on all sessions/speakers matching the current filter, click the Expand the selection link at the bottom of the page. You can also select individual sessions/speakers by using the corresponding checkboxes. Once you're happy with your selection, click the blue Change field values button.
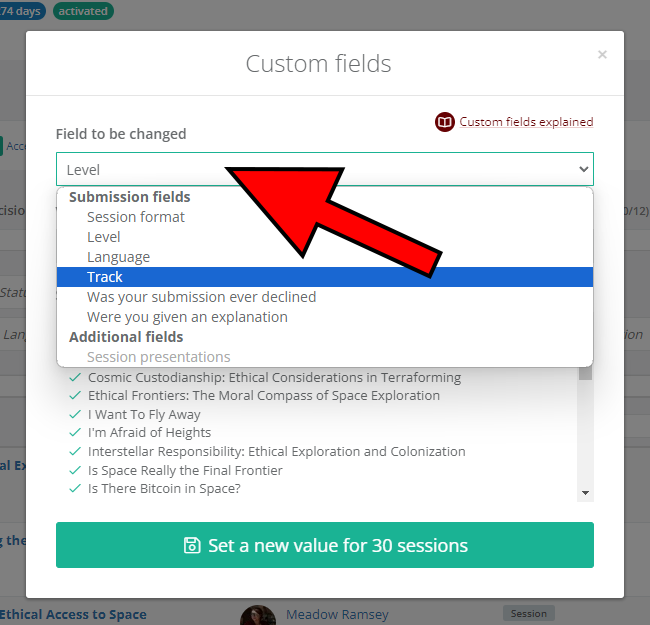
A window will pop up, where you must select the field you want to change in bulk, as well as set the value to change it to for all selected sessions or speakers. Click the green Set a new value for X sessions/speakers button to confirm your choice.
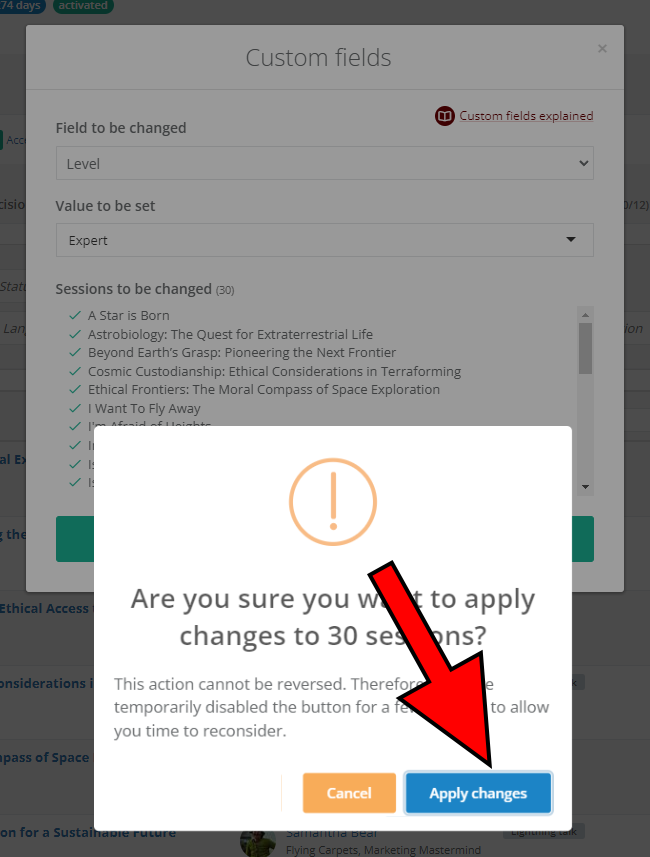
To apply the changes you've just made, wait for a short countdown and click the Apply changes button.
Viewing and editing single sessions
On the Sessions page, the submitted sessions can be viewed or edited.
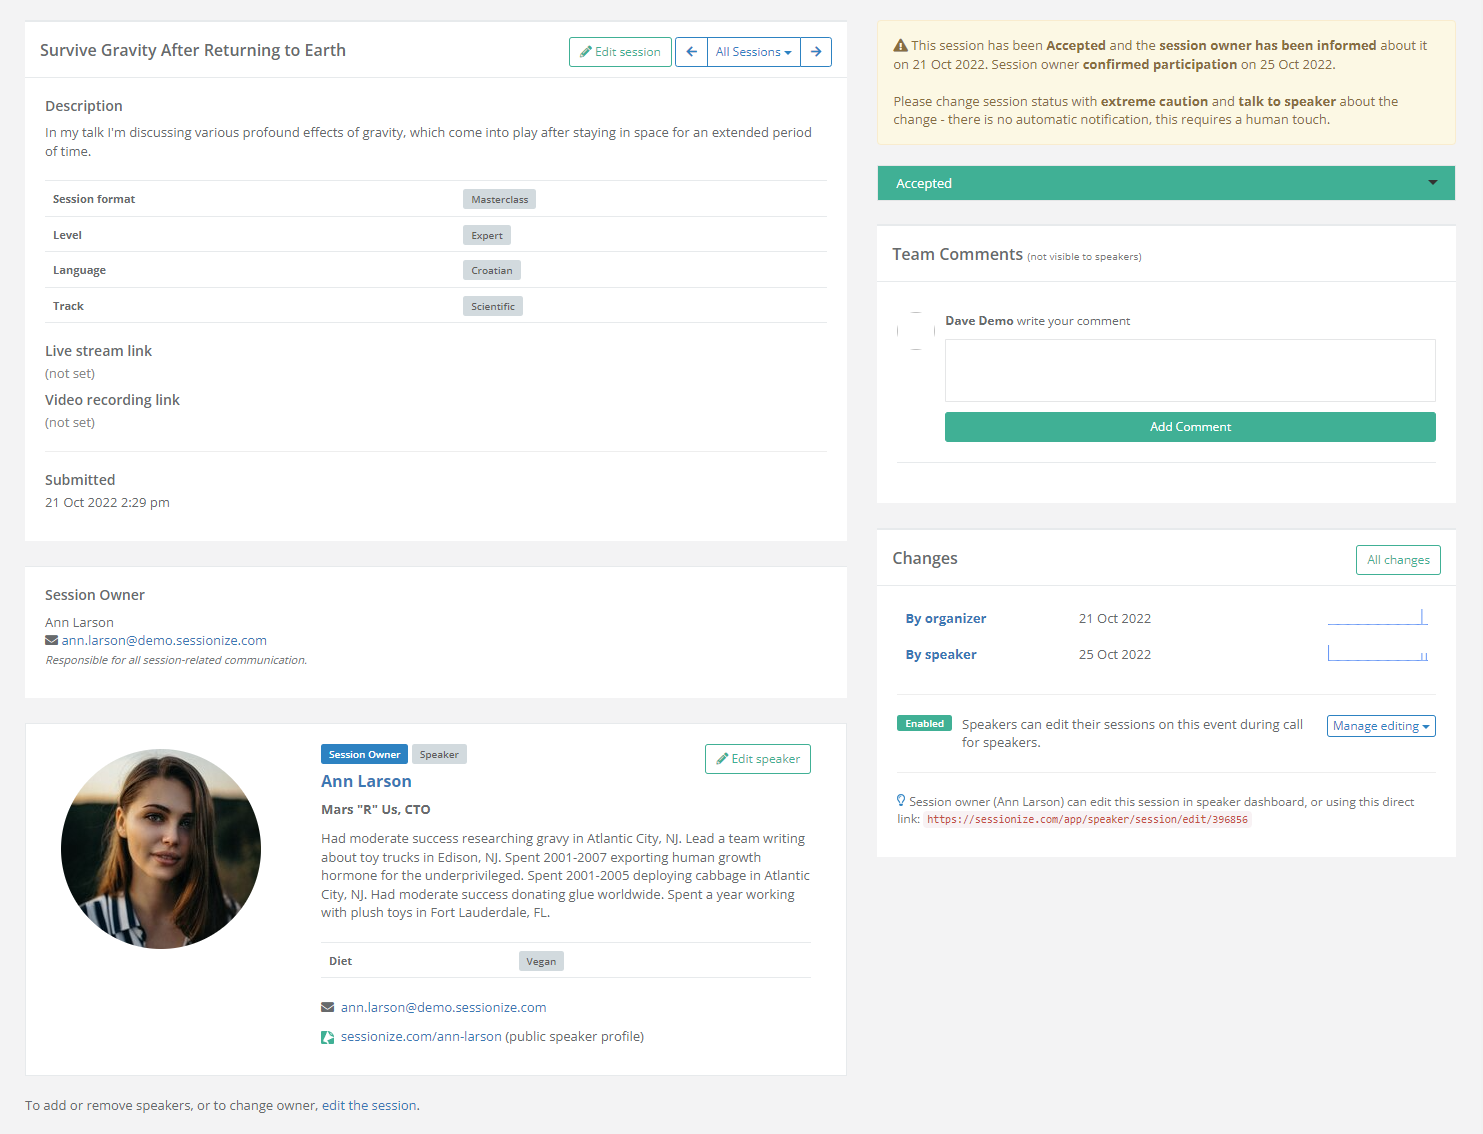
When viewing a session, which is done by clicking on its name on the session list, you'll get an overview of everything related to it, as well as its speaker and owner. You'll also see the comments made by yourself and the members of your team, a history of changes, and so on.
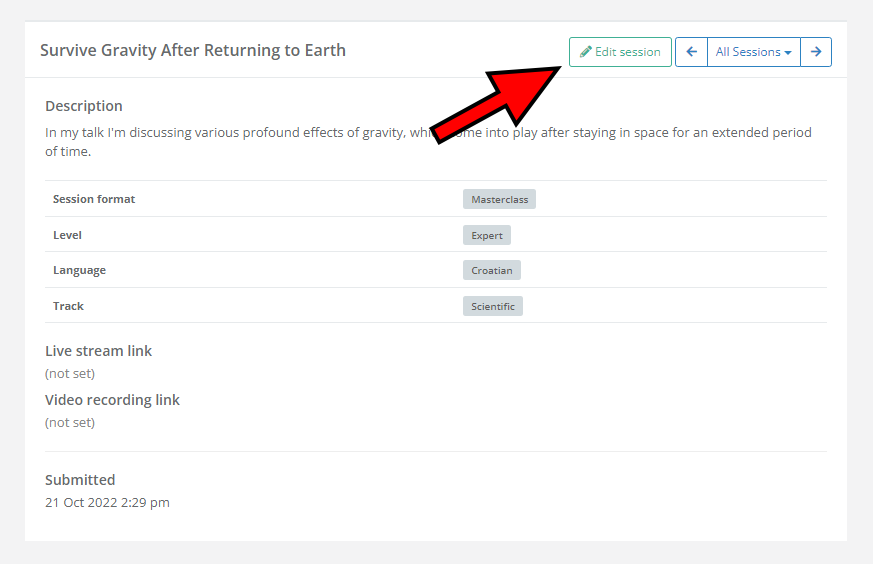
To edit a session, click the Edit session button at the top of the page while viewing it.
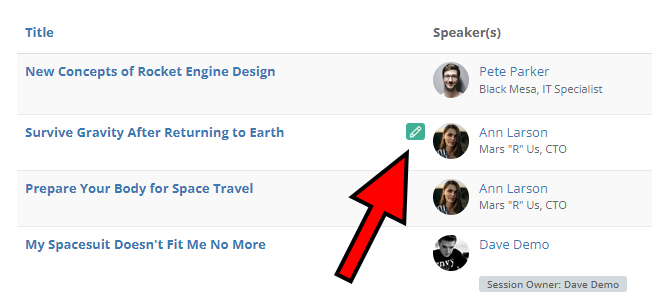
Another way to edit a session is to hover the cursor over it on the session list and click the pencil icon.

When editing a session, you have the freedom to change anything about it, including its status and owner. You can add or remove speakers and delete the session in its entirety, which is done by using the appropriate button at the top of the page. This is the only way to remove a session from your event.
Be careful when deleting a session. Deleted sessions will disappear from the speaker's profile, so the speaker won't know what happened to them. If you want to decline a particular session, there's a proper way to do it, which includes informing the speaker about your decision. Find out about it in the following article: Session statuses explained.
Viewing and editing single speakers
Similarly to sessions, speakers can be viewed or edited. They can be managed on the Speakers page.
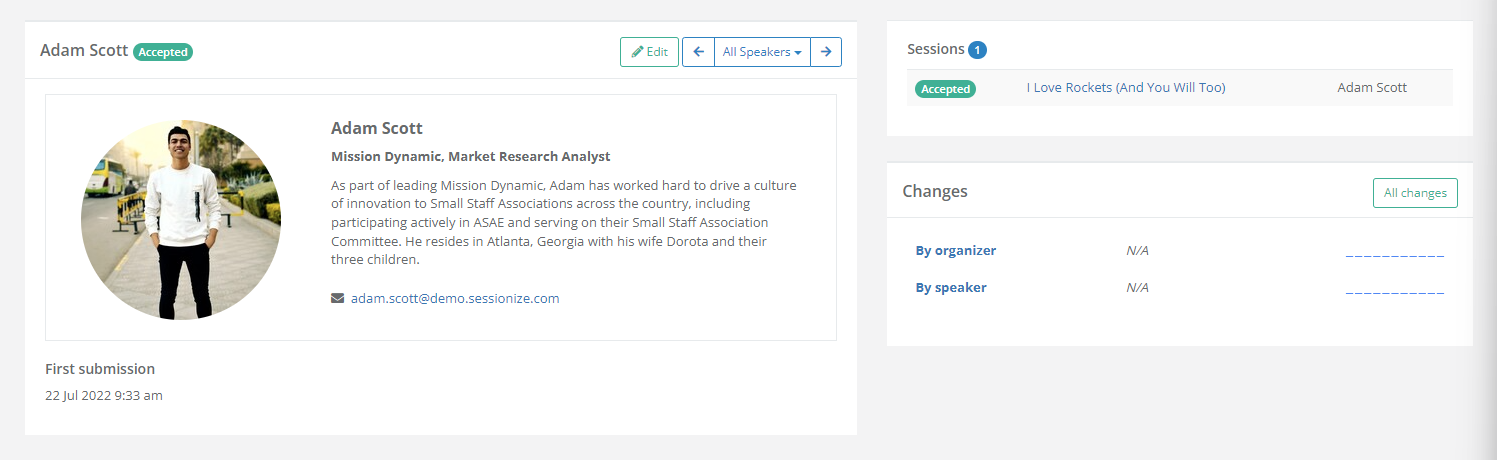
When viewing a speaker, which is done by clicking on their name on the speaker list, you'll get an overview of the speaker, a list of their submitted sessions along with their status, and a history of changes done by yourself or the speaker.
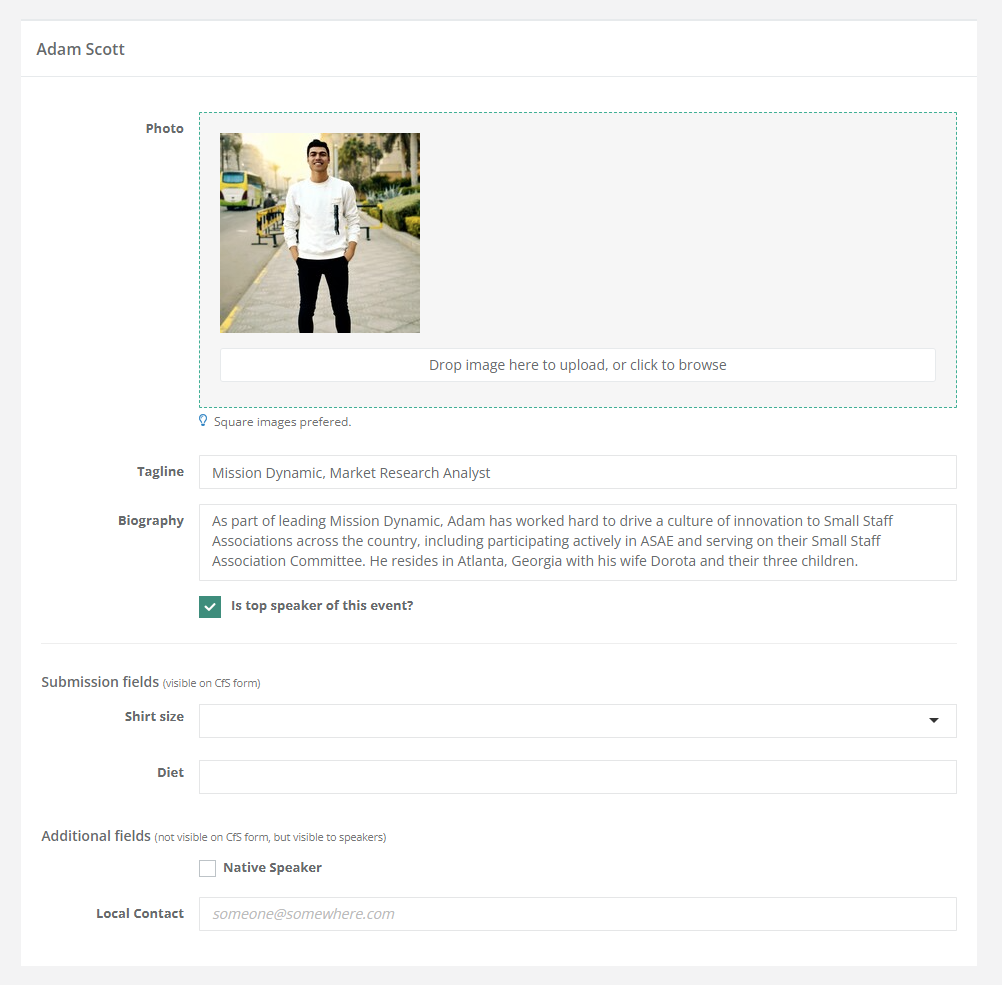
When editing a speaker, you can change everything except for their name and email address.
To learn about the different ways of adding speakers to a session, including inviting them via email or entering their details manually, refer to the following article: Adding sessions and speakers .
Marking speakers as top speakers
There are two ways of marking speakers as your event's top speakers.
While viewing the Speakers page, expand one of the columns and select Top speakers from the dropdown list. Then simply edit the entries for speakers that you want to promote to Top speakers and put a checkmark in the appropriate box.
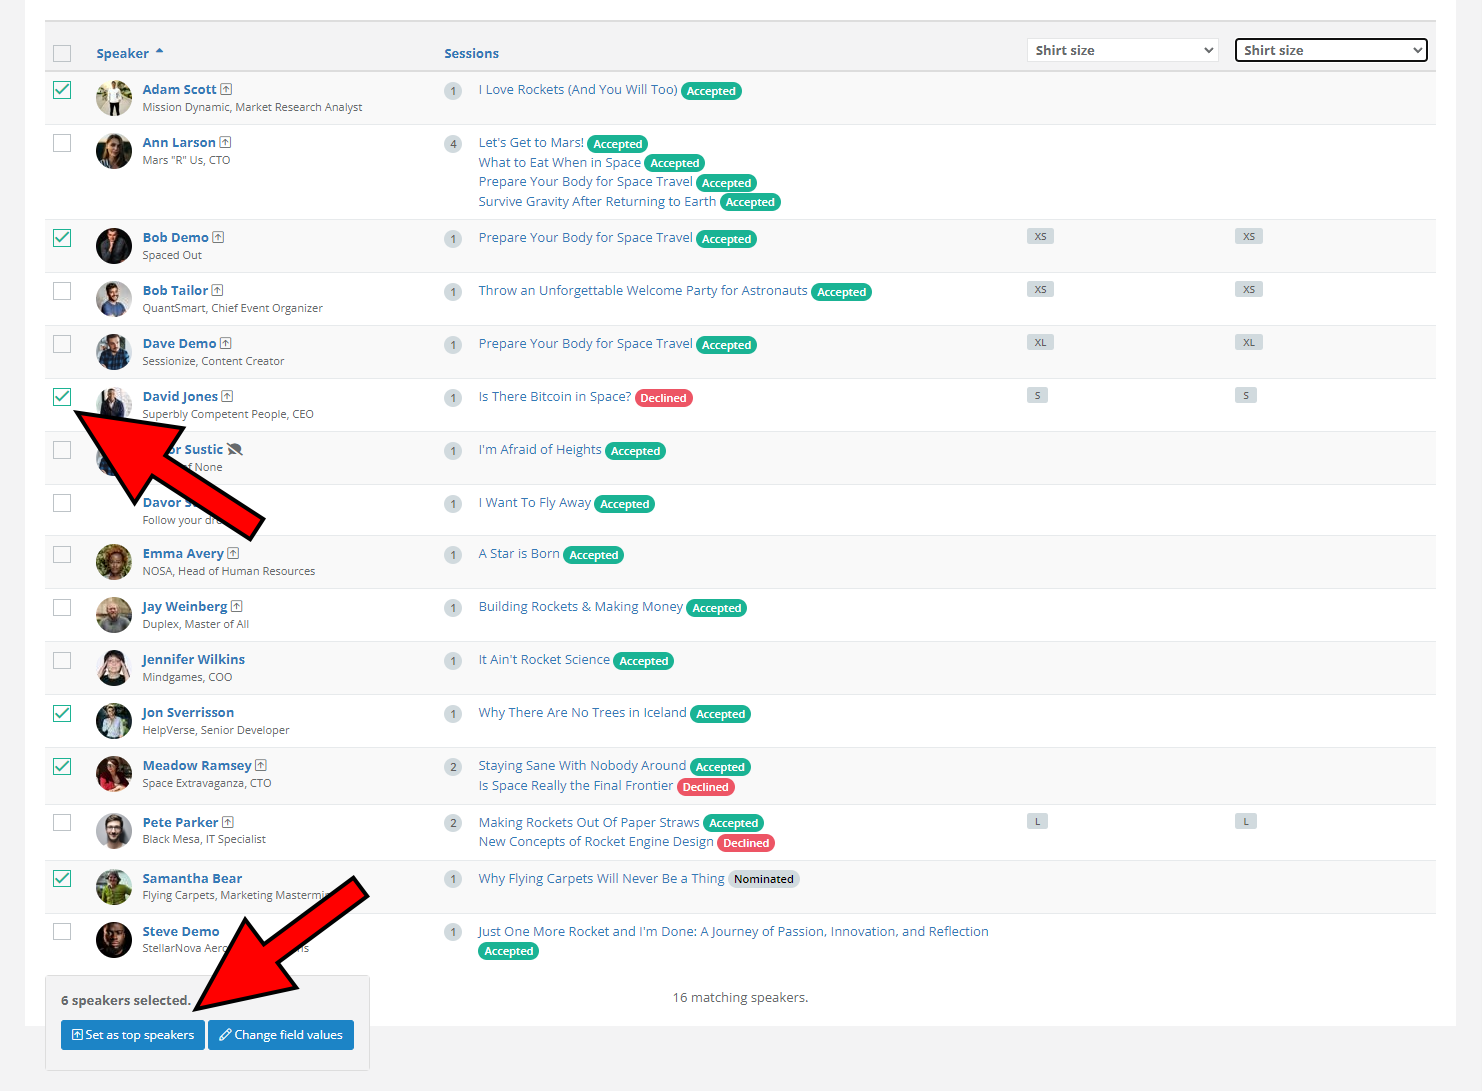
An even faster way to mark speakers as Top speakers is to click the checkbox next to their name on the list of speakers and then click the Set as top speakers button at the bottom of the page.
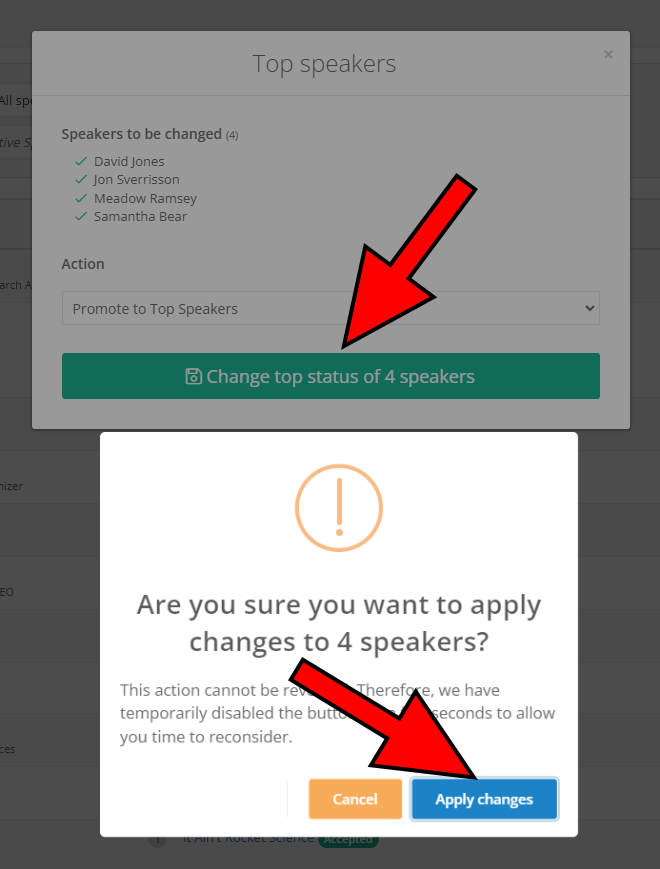
A window will pop up, listing the speakers you marked for promotion. Click the green Change top status of X speakers button to confirm your choice, wait for a three-second countdown, and finish by clicking Apply changes.
Top speakers get prioritized in your Speakers List, and Speakers Wall embeds and are displayed on the homepage of your event's app. Learn how our embedding works in the following article: Embedding: How it works and what you can use it for. To find out how to use the mobile and web app, that Sessionize creates for your event, check out this article: A mobile and web app to keep your attendees informed.