Sessionize offers two ways to create an event schedule. You can manually schedule individual sessions on the Scheduled tab of your event's Sessions page. Here you have to simply choose a room, date, and session start and end time.
For events with a larger number of sessions, a better way to go about building the schedule is to use our Schedule builder. It's a handy tool with an intuitive drag-and-drop interface, which will help you arrange your sessions quickly and efficiently, even when you're organizing an event that extends across several tracks and/or days.
Not seeing a session in the Schedule builder? Only accepted sessions can be scheduled. Check the session status on your event's Sessions page.
Accessing the schedule builder

The Schedule builder is found within the Schedule menu. It opens as a separate page and consists of two main parts: a list of your accepted sessions, located on the left, and the schedule itself.
Arranging rooms
Setting up the rooms is the logical first step in the schedule-building process. The Schedule builder comes with three rooms by default.
Adding, removing and editing rooms

Setting up the rooms is the logical first step in the schedule-building process. The Schedule builder comes with three rooms by default. Depending on the number of tracks your event has, you can easily add more or remove all but one, as well as rename the existing ones to your liking.
Collapsing and expanding rooms

To collapse and expand the rooms in the schedule builder, hover the mouse above the room name and use the Collapse/Expand Room button. This feature can be useful when you want to hide certain rooms from view, to give yourself a cleaner overview of the room you're currently adjusting the schedule for.
As long as you're accessing the Schedule builder from the same computer, the rooms will remain collapsed or expanded as you previously left them.
Rearranging rooms

To rearrange the room order, hover the mouse above the room name and use the Move left/Move right buttons.
Hiding the sidebar

There's no limit to the number of rooms you can add. If you have an event with many rooms, we highly recommend using the Schedule builder on a large screen. You can also use the green hamburger menu button, found next to the event name, to hide the sidebar and make the schedule roomier.
Rooms can also be configured on the dedicated Rooms page. Aside from adding or removing them and editing their names, there you can assign live stream links to individual rooms. That will enable your online audience to access the live streams in corresponding rooms through the embedded schedule on your event's website and within the mobile app.
Arranging sessions
The Schedule builder's drag-and-drop interface has many features, some of which are less obvious. Here are the most important ones!
Adding a session

Arranging the sessions on the schedule is done by dragging and dropping the sessions in the appropriate rooms and time slots. To adjust the duration of a session, grab the bottom edge of its tile and pull it to the desired length. The session's start time and duration are always visible in the session tile header.
The Schedule builder remembers the duration of the last session you adjusted and automatically assumes the same duration for every future session you drag and drop on the schedule. This can greatly speed up the process of building a schedule when multiple (or all) sessions have the same duration.
Moving sessions between rooms

When moving sessions between rooms, the moved session will automatically adjust its duration to align with the duration of a session scheduled in a different room, but in the same time slot. If there are no sessions already scheduled in the same slot, the moved session will keep its original duration. Another way to keep the original duration of a session you're moving is to press and hold CTRL (Windows)/Cmd (macOS) while moving the session.
Removing a session

To remove a session from the schedule, grab its tile and drag it back to the session list on the left side of the window.
Adding extra hours

By default, the Schedule builder allows you to start building your event's schedule from 8 AM. If you want to start earlier, use the Add an hour button. Each click adds an extra hour to the schedule.
Zooming in

When adding shorter sessions, use the zoom-in button to make them easier to work with.
Swapping places

The quickest way to switch places between two sessions is to drag them precisely on top of each other.
To move a session to a different day, drag it to the session list, then select the desired day, grab the session from the list, and put it where you want it.
Using different coloring options

To visually help you organize the schedule, Schedule builder lets you color the sessions by category. The categories available in this menu are directly defined by the single or multi-choice fields you added in the Submission fields tab on the Edit event page. The sessions are color-coded depending on your selection. This is only a visual aid in the schedule-building process; the selected color coding isn't visible in the embedded schedule or anywhere else outside of the Schedule builder.
Using plenum sessions

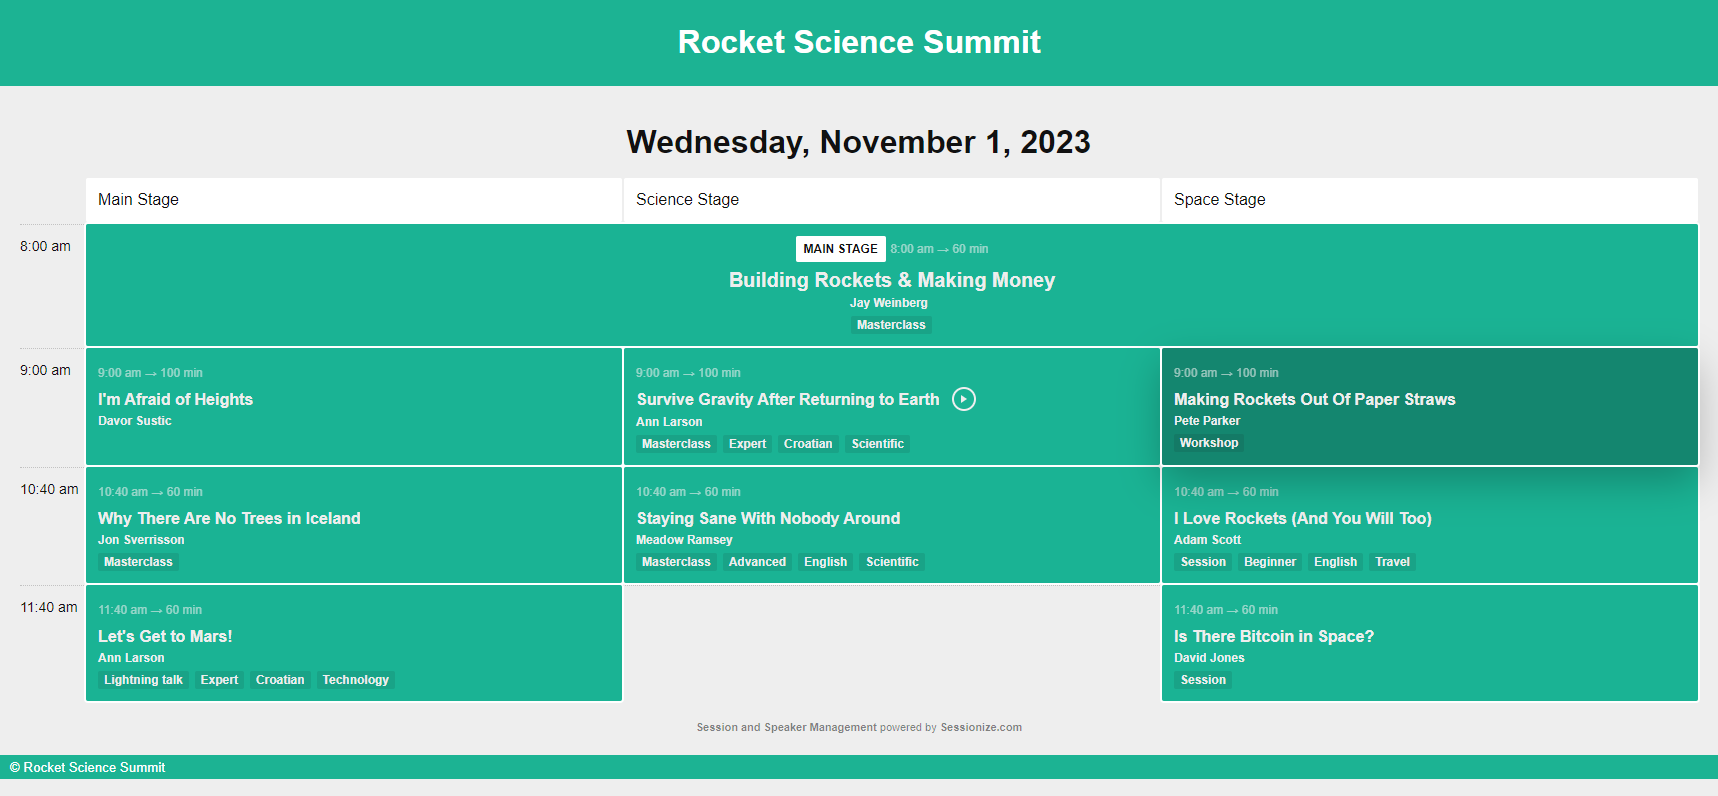
Plenum sessions visually extend over all rooms, taking up the corresponding time slot in the entire schedule. A good example of a plenum session is your event's main keynote. To add a plenum session, simply pull the desired session in the appropriate room, hover the cursor over its tile, and click Mark/Unmark as Plenum Session.
Although a plenum session extends over all rooms, you initially still have to place it in a room it's being held in, as that room's name will be visible in your schedule.
Adding service sessions

No event can go without an attendee registration or a coffee break, which we call service sessions. Service sessions are added to the schedule just like other types of sessions. You can add an unlimited number of custom service sessions by using the Add Service Session button below the search bar.
Here are some ideas of the things you can add as service sessions:
- Registration
- Lunch, coffee break, and all other types of breaks
- Event's official dinner and/or party
- Expo opening times
- Placeholders for future unscheduled sessions
- All other circumstances when you need to add a session without a speaker
Like any other session, a service session can be expanded into a plenum session. This can be useful, for example, when adding an event-wide lunch break or event registration to the schedule.
Building a schedule for multiple days

If your event lasts for two or more days, the Schedule builder will automatically split the corresponding dates into separate tabs. Access each of those tabs and arrange the schedule as preferred. The dates available in the Schedule builder are automatically added after you set the event dates on the Edit event page.
All rooms you added to your event are visible on all dates in the Schedule builder. However, if one or more rooms don't have any scheduled sessions on certain days, those rooms won't be displayed in the embedded schedule on your event's website. This is so you can offer a cleaner, more optimized version of the schedule to your attendees.
After you're done building a schedule for your event, the schedule isn't visible to anyone but yourself and the members of your team. That way, you still have a chance to make last-minute tweaks and changes privately. To make the schedule visible to others, you have to announce it. Please refer to the following article to find out how: Announcing the Schedule.