As soon as you start organizing your event, you automatically start creating various data, such as event dates and times, session and speaker information, rooms, schedule, and so on. There are several ways of using such data. Here's a quick overview.
Embedding
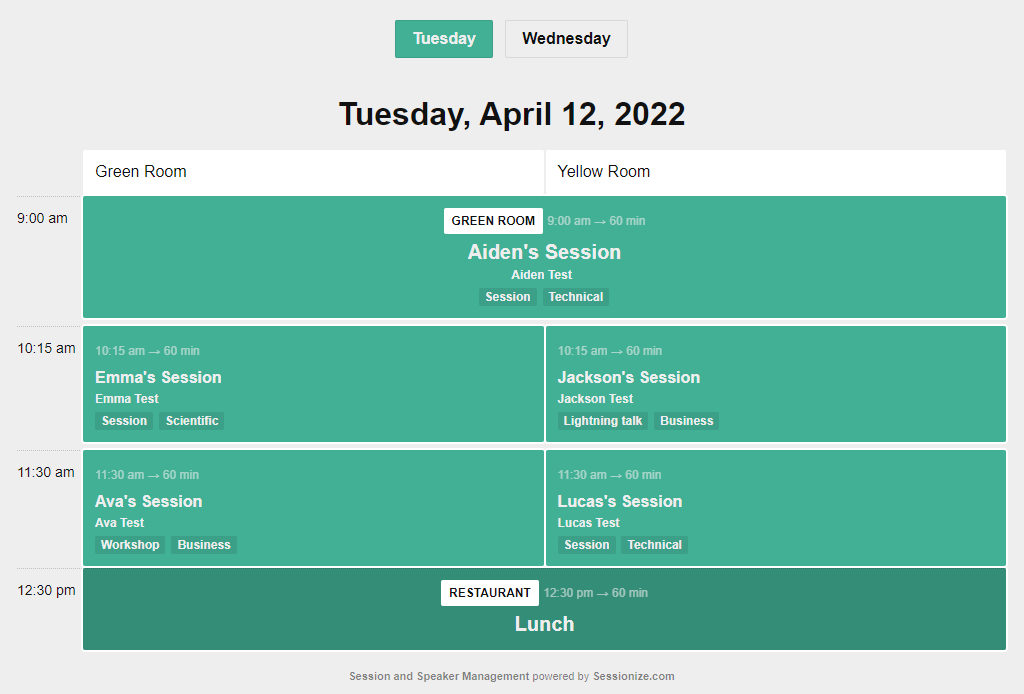
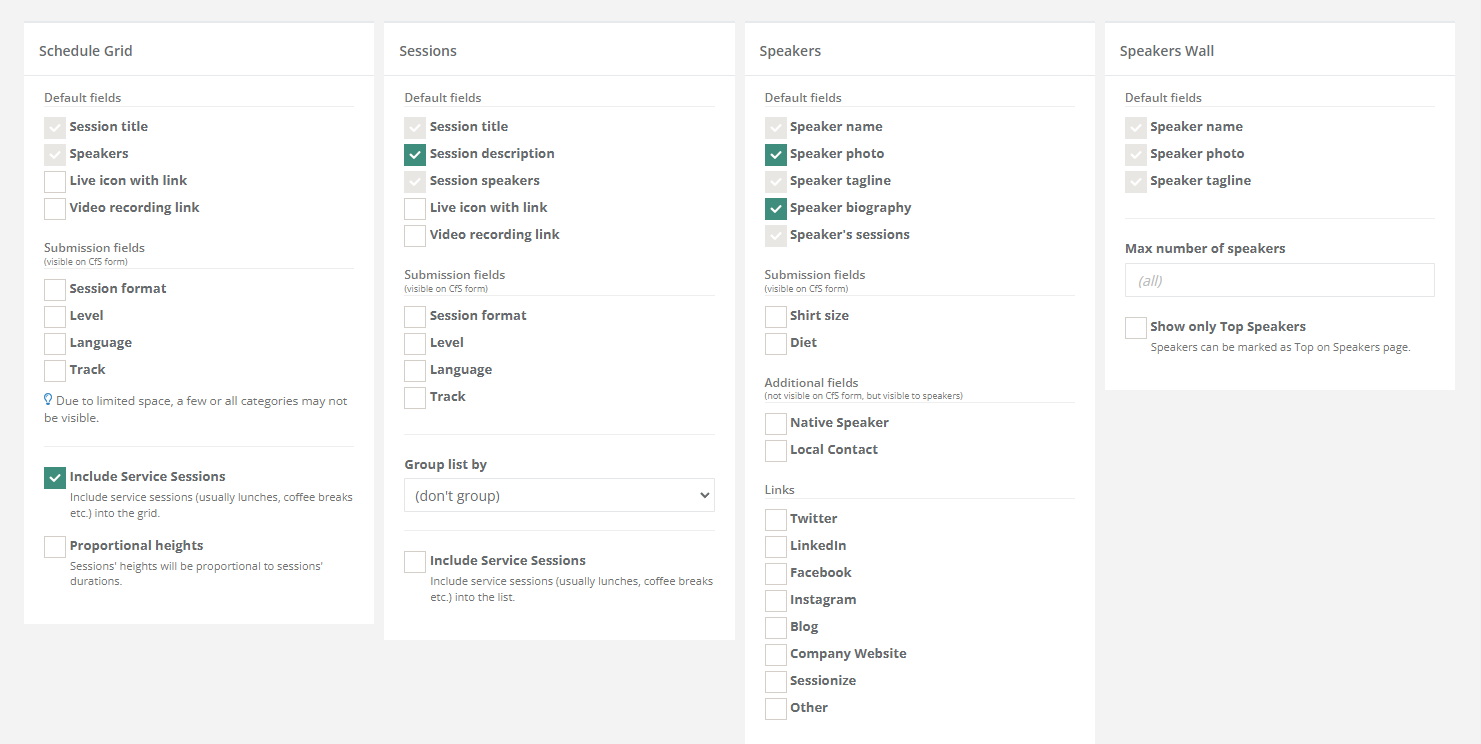
One of the main ways of using the data you created when building your event's schedule is to display it on your event's website (or any other website you manage). This is what we call embedding.
Sessionize offers four embedding options: a schedule grid, a list of sessions, a list of speakers, and a speaker wall. You can use any of them on your event's official website or any other website you manage. You only need to add a single line of code, which you'll create on your event's API / Embed page. Every change you make to your schedule, speakers, or sessions will automatically apply to your embeds.
For an in-depth look at our embedding system, please refer to the following article: Embedding: How it works and what you can use it for.
API
Your developers can utilize our API to obtain read-only data access to your event's data. You can use the data from the server or client side, whichever suits you better. We offer read-only data in JSON and XML formats. The iCalendar format is also available, but it has limited capabilities (only basic session info is available). Please take a look at the following article for a better understanding of our API integration options: API: Access your data from code.
App
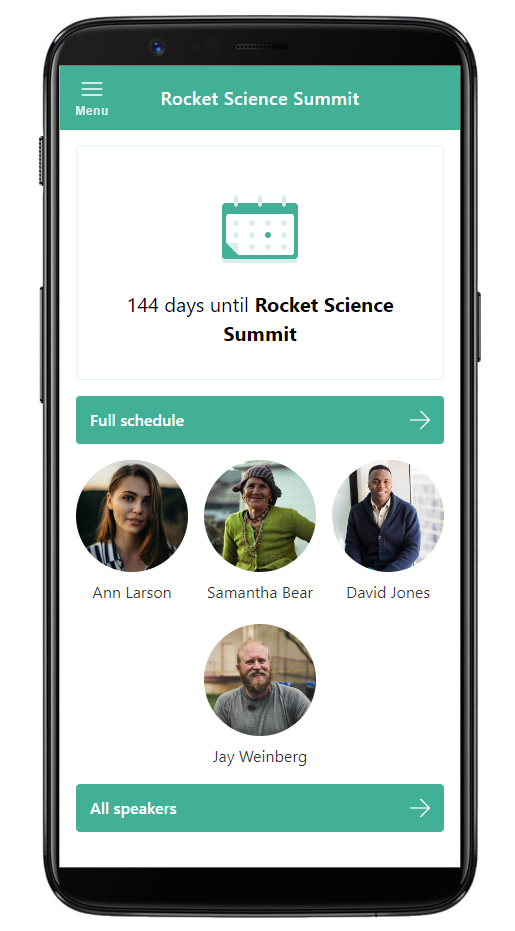
Another way of using your schedule, as well as session and speaker information, is to create a mobile and web application. This is done with just a few clicks (and with no extra charge of any kind) on your event's App page. Your attendees will find it useful to keep informed about the event's schedule, build their personal schedule, check session and speaker details, and favorite sessions and speakers they don't want to miss.
The process of building the app for your event is simple. Learn about it in the following article: A mobile and web app to keep your attendees informed.
Export
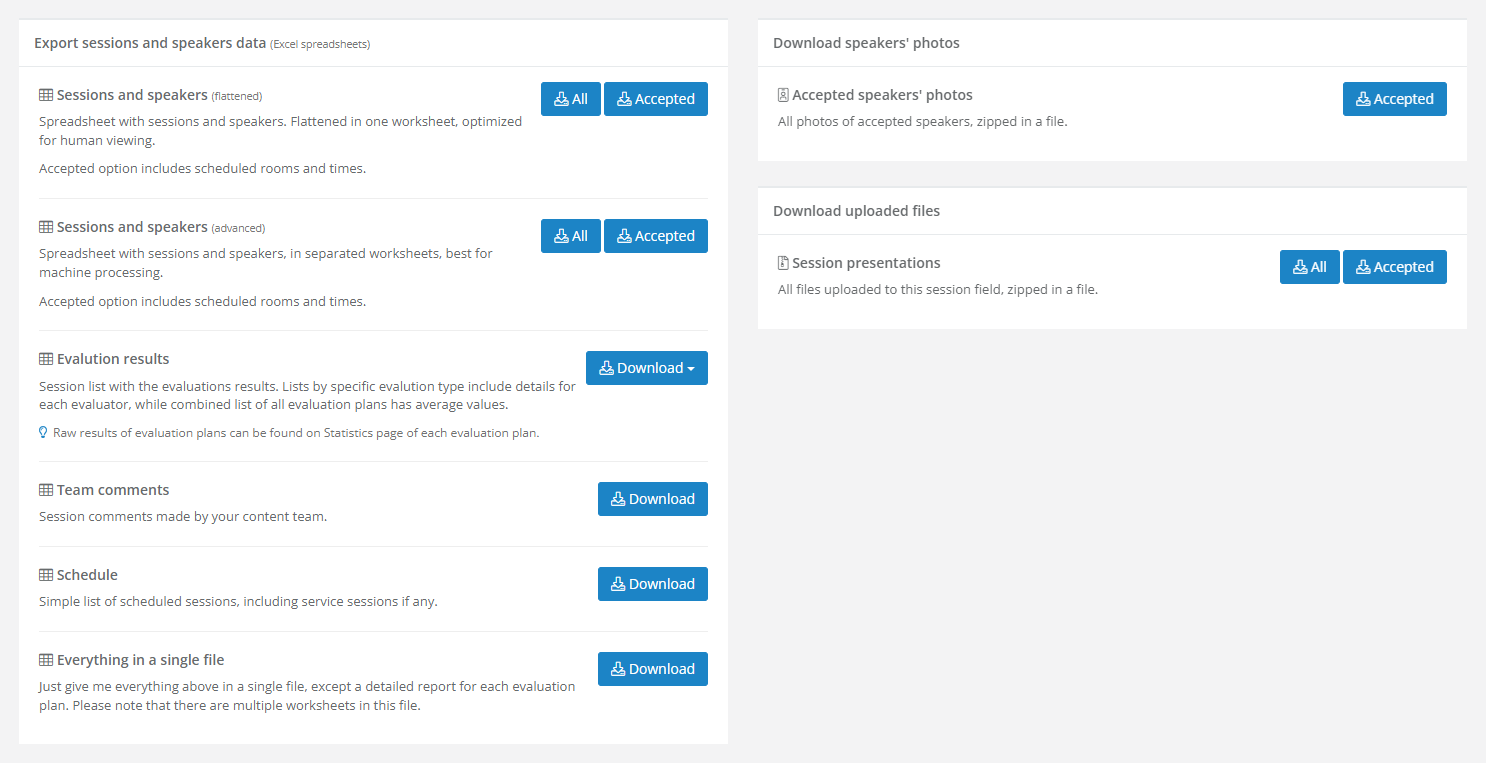
On the Export page, you'll find your event's data in a downloadable form. Here you can grab session and speaker information, evaluation results, schedule, as well as team comments, organized in spreadsheets and prepared both for human and machine processing.
The Export page also lets you quickly download photos of all accepted speakers (your designers will thank you!).
Finally, if you requested files, such as presentations, from your speakers by adding a file upload field on the Edit event page, you can download them on the Export page, too.