Sessionize offers two kinds of video links that you can add to your embedded schedule, app, and API: live link and recording link. They differentiate in when and how they're displayed, with each serving a specific purpose.
Live link explained
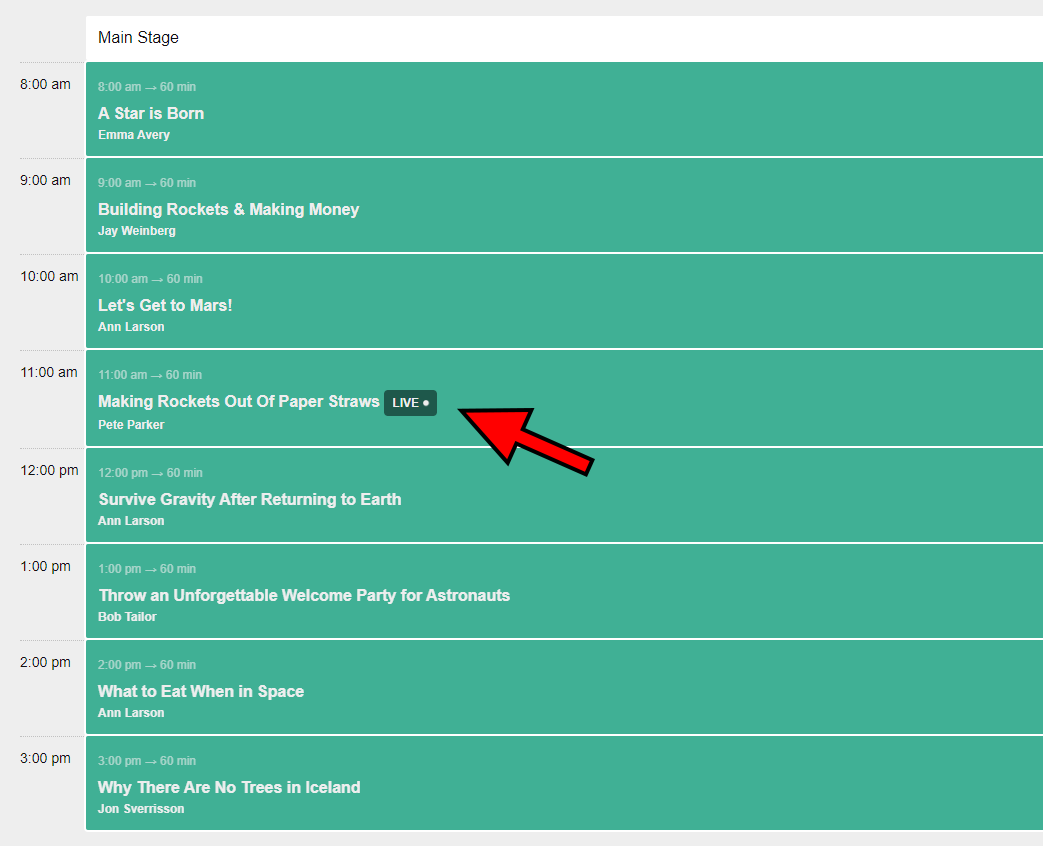
Live link is a link to a video on a video streaming/hosting platform of your choice. The key feature of a live link is that it becomes visible and clickable in your embedded schedule, in the event's app, and within the API during the session slot.
Here are some common examples of a live link:
- Live stream from your event
- Prerecorded video of a session
- Link to an interactive meeting
If you're, for example, live streaming from your event, when your audience clicks the LIVE button found next to a session in the embedded schedule or in the app, they'll be instantly taken to the live stream of that session.
The LIVE button automatically switches between sessions in the embedded schedule/app/API. Try your best to stay within the allocated time slots in the actual event to avoid confusion for your online audience.
Recording link explained
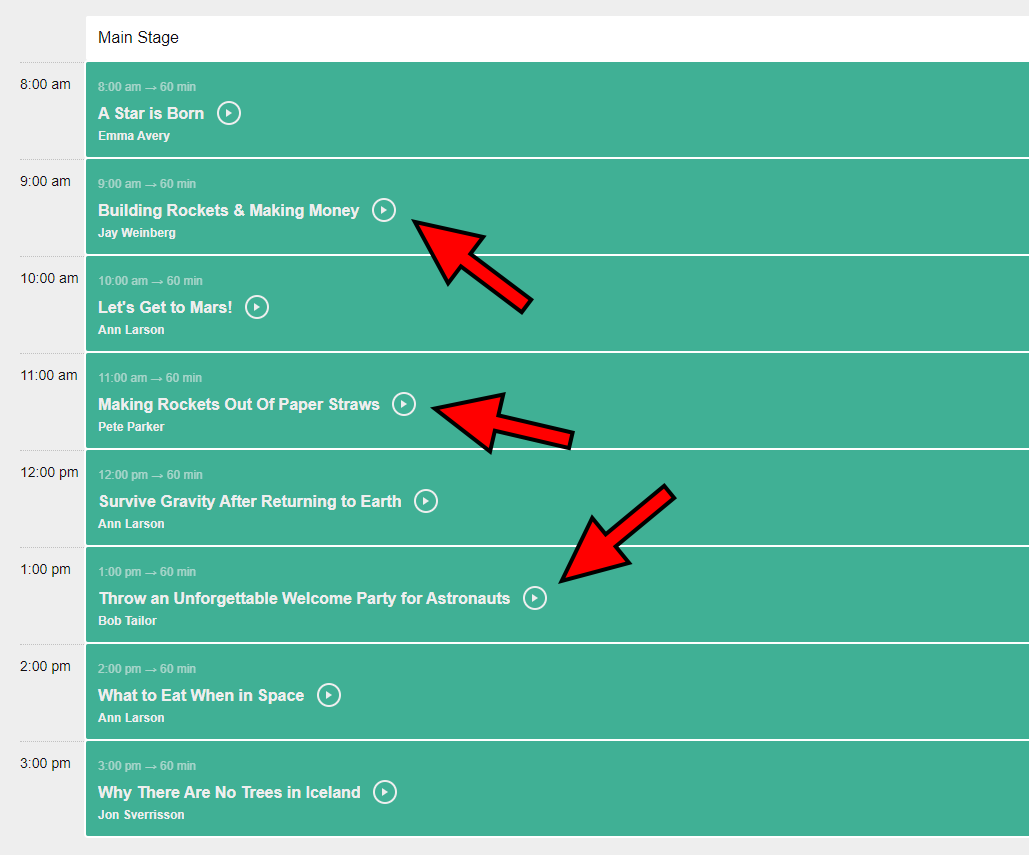
Recording link is also a link to a video on a video hosting platform of your choice, but with a very important differentiation compared to the live link: it becomes visible and clickable only after the session has ended.
The main purpose of a recording link is to link to the recordings of your event's sessions. After you upload the sessions to a video hosting platform and attach appropriate recording links to the sessions, your audience will see a clickable play button in the embedded schedule, app, and API.
Add live and recording links
The quickest way to add live and recording links is to visit the Sessions page and select Live link and Recording link in the two dropdown menus. Then simply click the pencil icon and add video links to appropriate sessions.
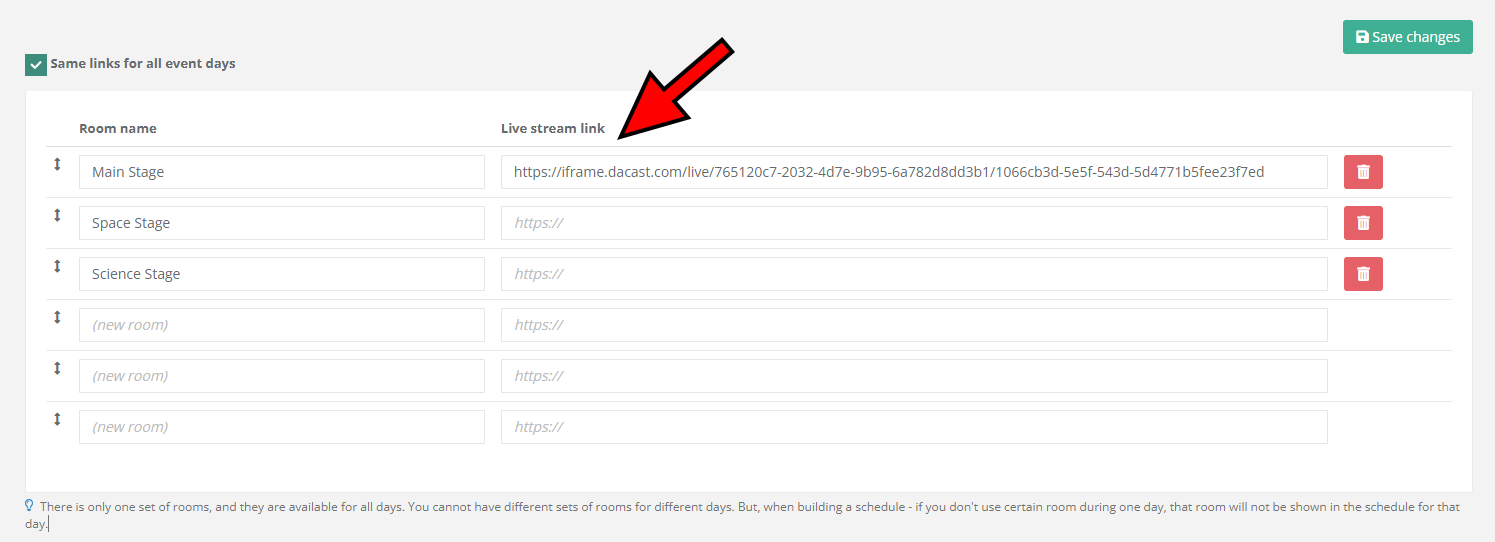
If your event has a single live link for an entire room, which is usually the case when you're live streaming from that room, you can add the live link to an entire room instead of adding it to each session. This is done on the Rooms page. Simply enter the link in the Live stream link field next to the appropriate room. Remember to click Save changes to confirm.
For events spanning multiple days, you can use the same live-streaming link for a particular room for all event days, or you can have a different live-streaming link for each day. Use the Same links for all event days checkbox to select your preferred option.
Configure your embeds
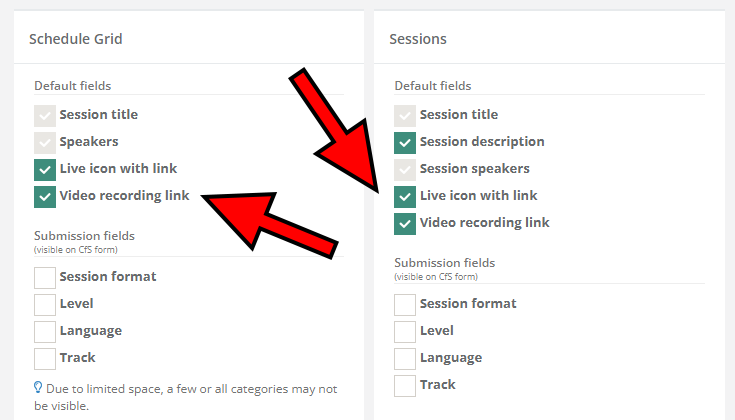
To get the live and recording links to show in the embedded schedule, app and API, visit the API / Embed page, open the desired endpoint and scroll down to the Schedule Grid and Sessions sections. Make sure you tick the Live icon with link and Video recording link checkboxes to enable the LIVE and play buttons for Schedule Grid and Session List embeds.
To find out how our embedding works, please read the following article: Embedding: How it works and what you can use it for.